
Push notifications with FCM
Learn how to add push notifications to your app with Firebase Cloud Messaging (FCM).
The Kustomer Chat Android SDK uses Google Firebase Cloud Messaging (FCM) to send push notifications.
This tutorial covers how to add FCM to your app, configure push notifications in Kustomer, and handle push notifications in the SDK for users.
Firebase Cloud Message Server API Keys are being discontinuedTo ensure uninterrupted service to Android push notifications, you must upload your new FCM Private Key file to Kustomer by June 20, 2024. Legacy keys will no longer be supported after this date. For information on creating your new FCM Private Key file, see Configure push notifications in Kustomer below.
Prerequisites
You'll need the following to set up push notifications with FCM:
- Access to your team's project in the Google Firebase console and any necessary permissions for related tools (for example, Google Analytics).
- Admin permissions for your Kustomer organization to change Chat Management: SDK settings.
Step 1. Add Firebase Cloud Messaging to your app
First, use the Google Firebase console to add FCM to your app. To learn more, see Add Firebase to Your Android Project from the Google Firebase documentation.
-
Open your project in the console for Google Firebase. If you do not have an existing project, create a new one.
-
In your project, select Add Firebase to your Android app and follow the instructions to generate your
google-services.jsonfile. For your package name, copy and paste the package used in your applicationAndroidManifest.xmlfile. -
Save the google-services.json file generated by the tool at the root of your Android application (//google-services.json).
-
Follow the Gradle instructions, and modify your Project-level and App-level
build.gradlefiles accordingly:
Project-level
buildscript {
   dependencies {
       // Add this line
       classpath 'com.google.gms:google-services:4.3.3'
   }
}
App-level
// Add to the bottom of the file

apply plugin: 'com.google.gms.google-services'- After you modify your
build.gradlefiles, select Sync now in the bar that appears in the IDE.
Step 2. Configure push notifications in Kustomer
After you add FCM to your app, navigate to the Firebase console and download the FCM Private Key file under Project Settings. Once the FCM private key file download is complete, open your Kustomer account and configure push notifications on your Chat Management: Install Chat settings page.
-
You'll need your FCM Private Key file to configure Android SDK settings for push notifications in the Kustomer platform. To locate your FCM Private Key file in your Firebase project, go to Project Overview > Project settings.
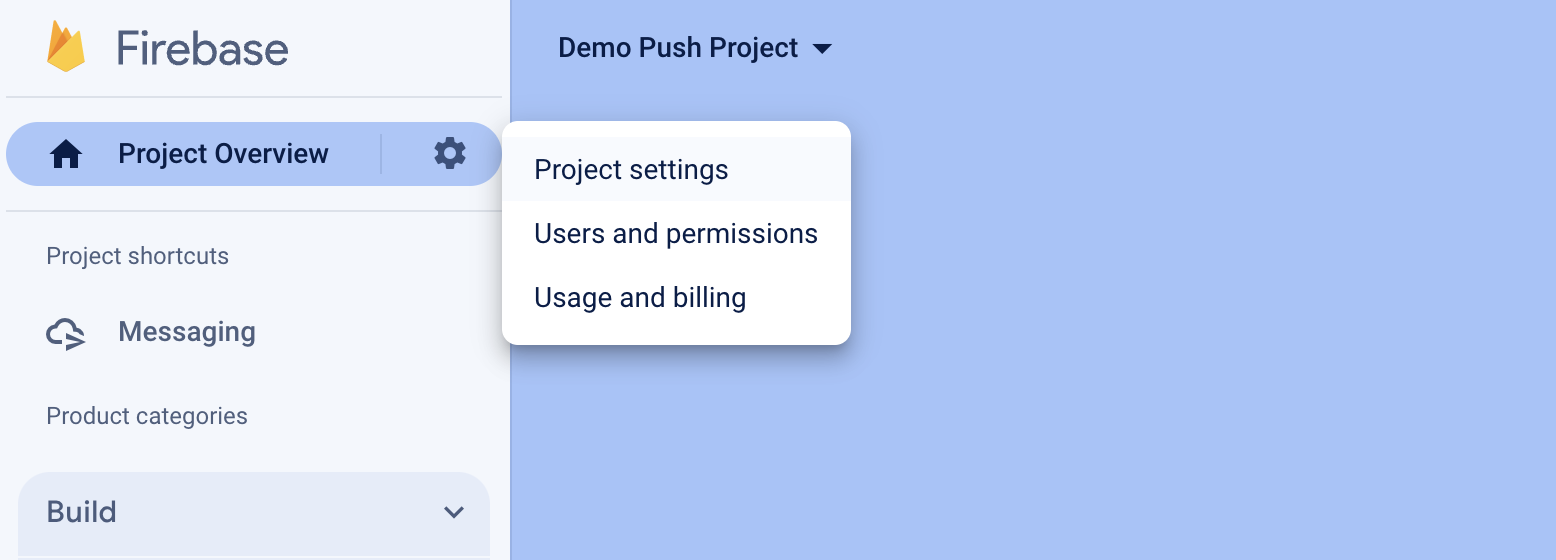
Firebase Project settings
-
Go to the Service accounts tab and select Generate new private key.
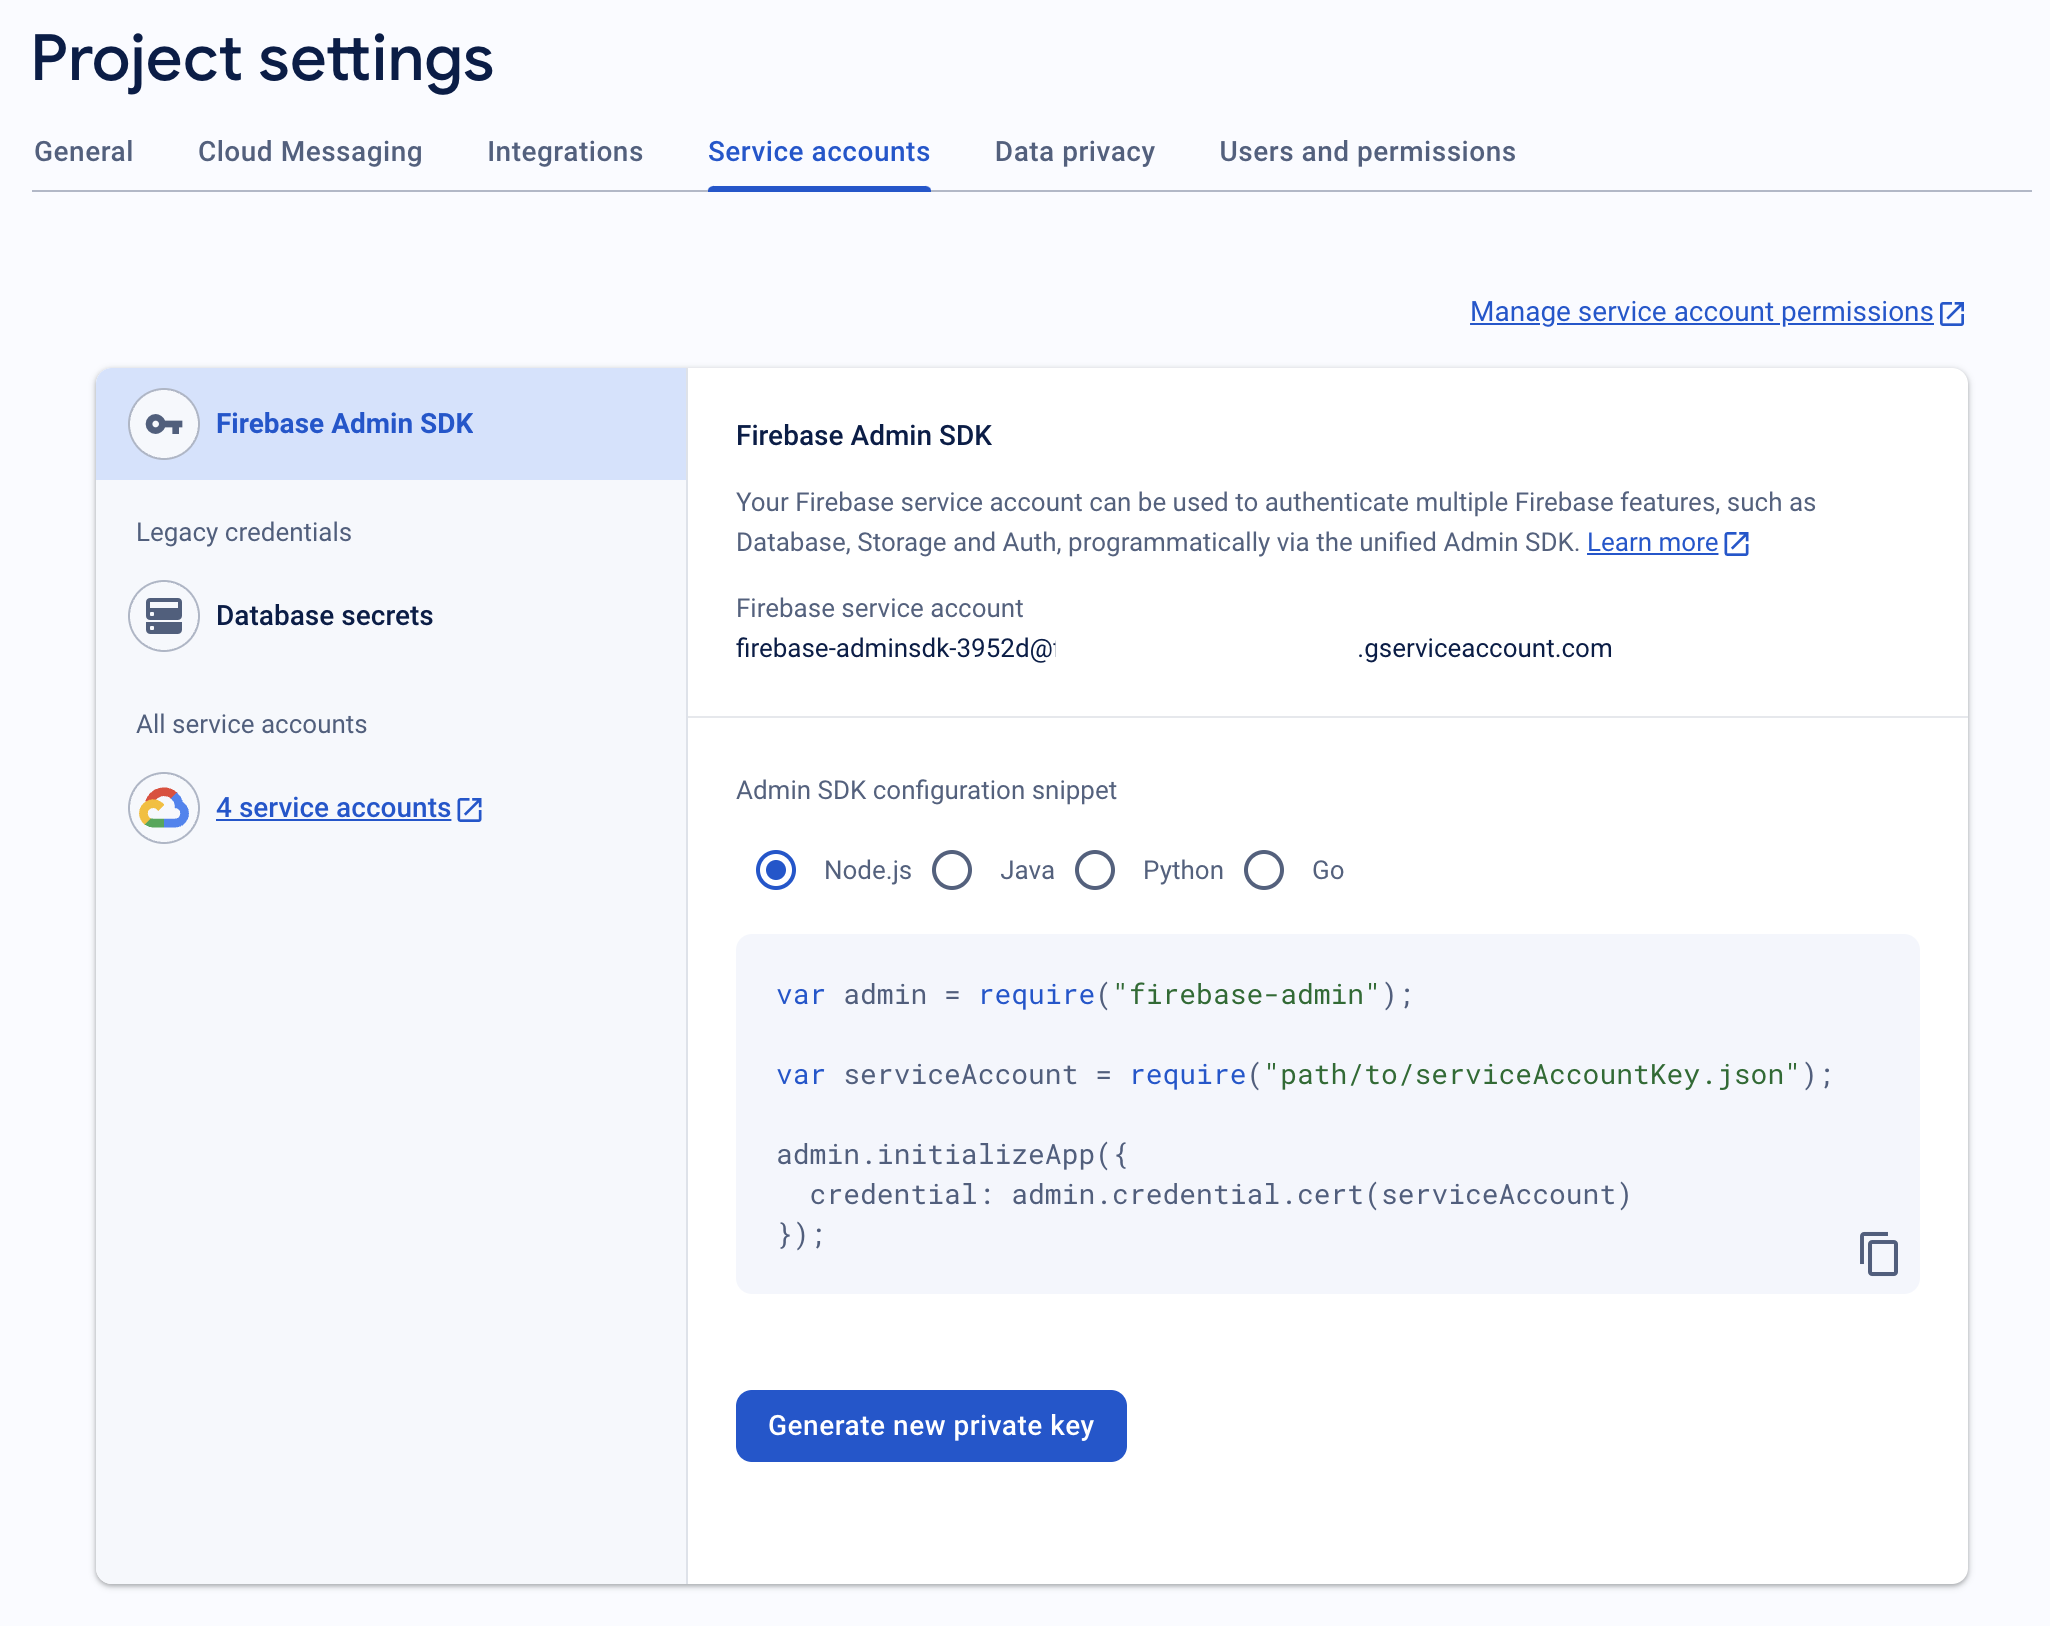
FIrebase Service Accounts
-
Then select Generate Key to download the private key file.
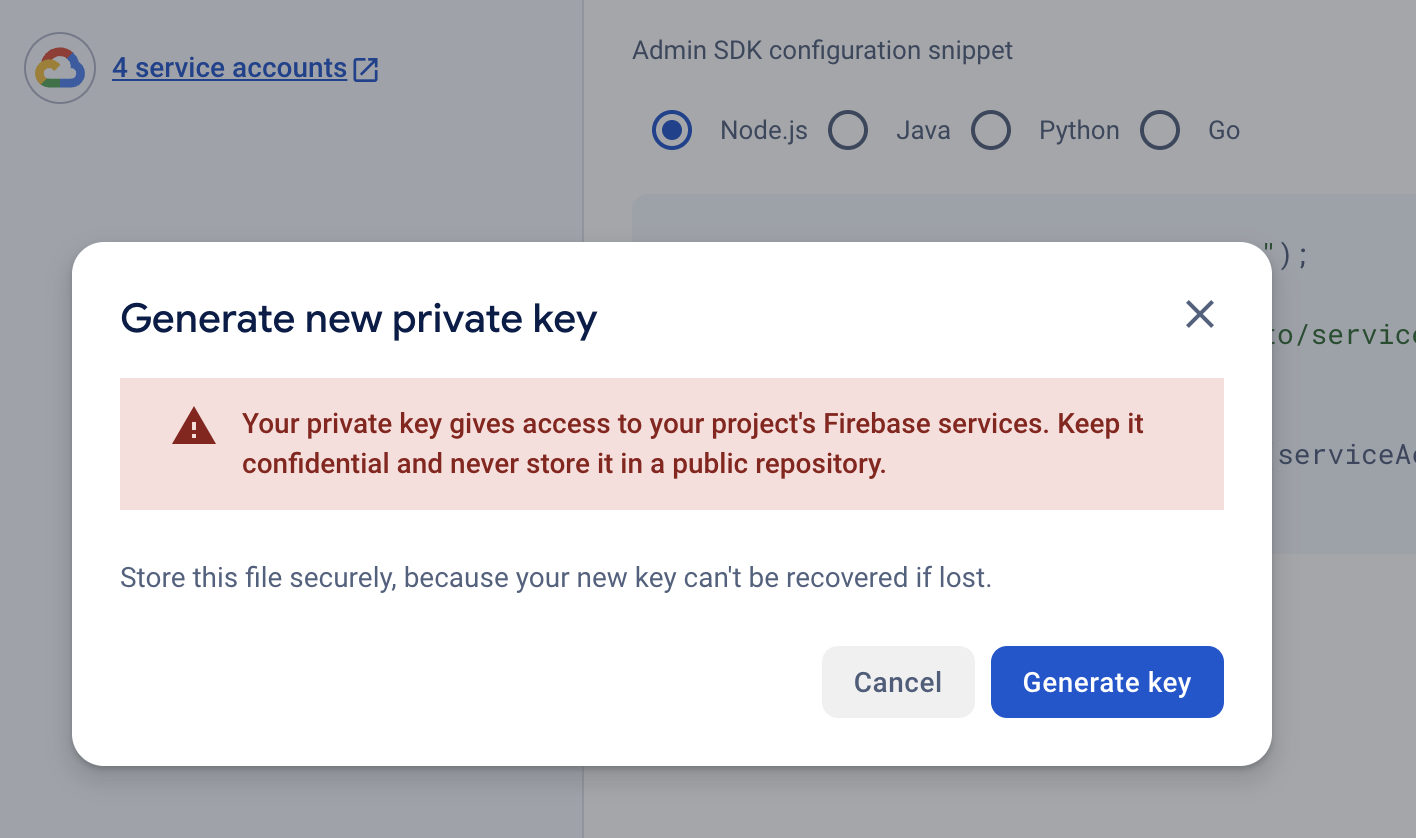
Generate a private key
-
Once the private key file is downloaded, open Kustomer as an Admin user, go to Apps > Chat, and select the Install Chat tab.
-
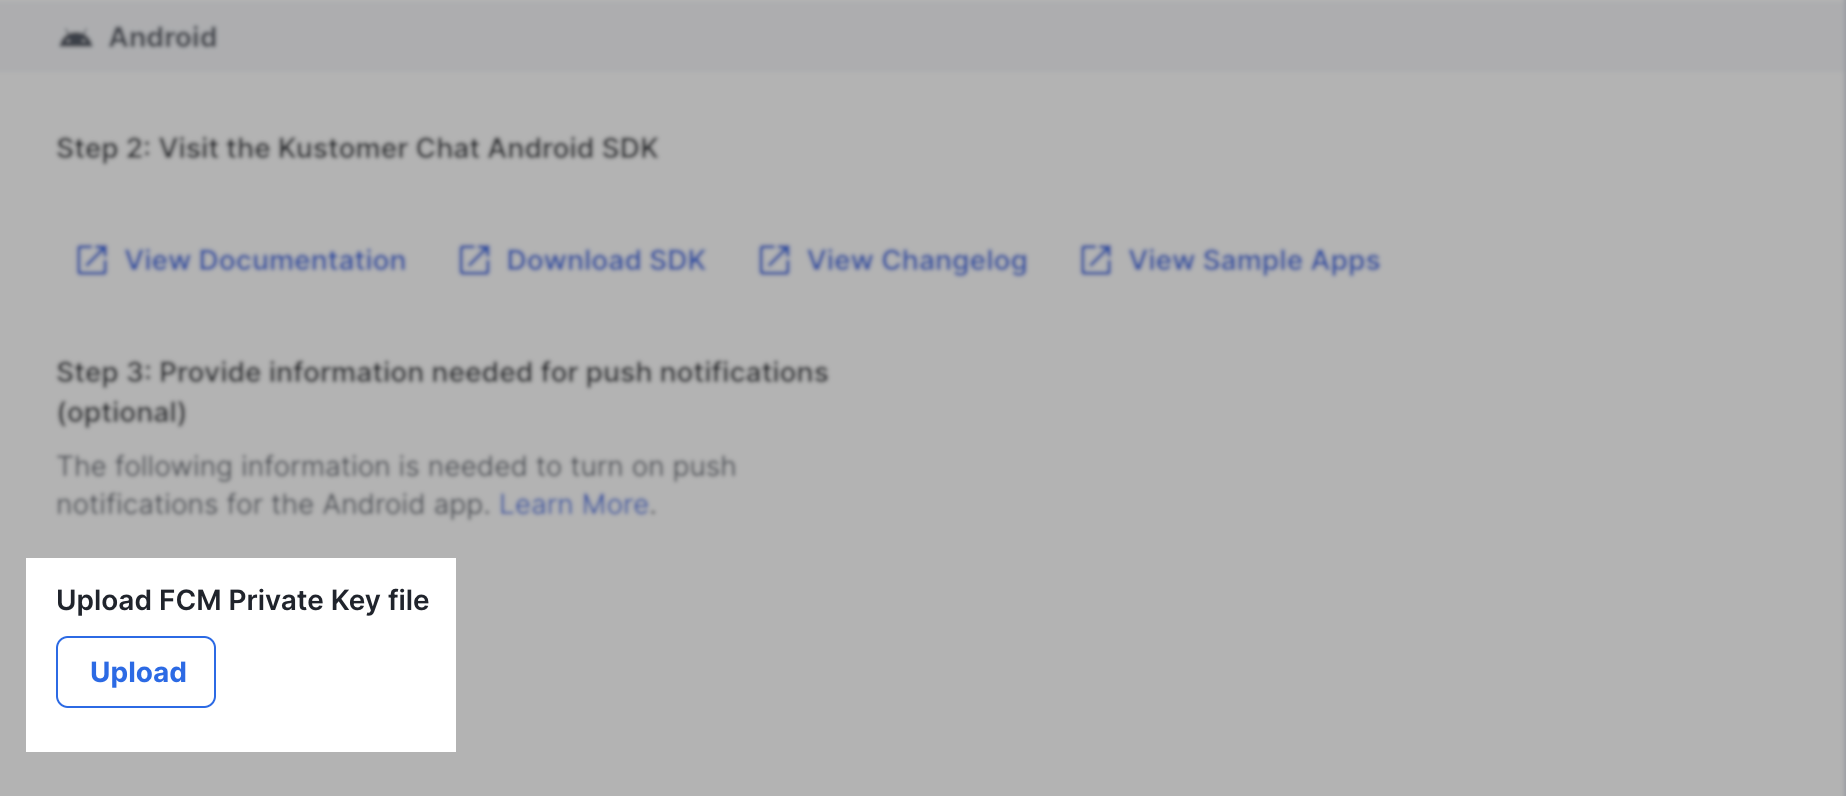
Upload the FCM Private Key file in the Android section of the page and then select Save Changes to create a keyset for the Android SDK.
The ability to upload the Private Key file is currently being rolled out to organizations in stages. If you are ready to complete the migration and do not see the Upload option, contact [email protected].
Step 3. Register device for push notifications
You can implement one of the following options to distinguish Kustomer push notifications from your own app push notifications:
- Use
registerDeviceto have the Kustomer SDK fetch the device token fromFirebaseInstanceIdand to register the device token.
Kustomer.getInstance().registerDevice()
Call registerDevice after Kustomer is initializedCall
registerDeviceeither in theKustomer.init()call back or ononActivityCreatedto ensure your Application class has initialized before you callregisterDevice.
- Use
registerDeviceToken(token)to register the device with a token that you specify yourself.
suspend Kustomer.getInstance().registerDeviceToken(token){
            when (it) {
                is KusResult.Success -> it.data
                is KusResult.Error -> it.exception.localizedMessage
            }
        }
Step 4. Forward Kustomer push notifications to the SDK
If your Android app doesn't handle push notifications yet, the Kustomer SDK adds its own implementation of FirebaseMessagingService to your AndroidManifest and automatically handles the notifications. Continue to Step 5 to learn how to deregister devices for push notifications.
If your app already has an implementation of FirebaseMessagingService, you'll need to override FirebaseMessagingService on onMessageReceived and identify whether or not an incoming remoteMessage is a Kustomer push notification. You don't need to do anything with Kustomer push notifications because the SDK will handle these automatically. If needed, add any handling you require for the push notifications from your own app.
override fun onMessageReceived(remoteMessage: RemoteMessage) {

        //Push notification received
        val isKustomerPush = KusNotificationService.onMessageReceived(remoteMessage: RemoteMessage, applicationContext: Context, customBackStack: TaskStackBuilder?)
        if (isKustomerPush) {
            //Do nothing
        } else {
            //DO HOST LOGIC HERE
        }
    }
Notes:
- Allowed message types for remote messages
The Kustomer Chat Android SDK will ignore any remote messages that aren't one of the allowed chat Message Types.- Override for the push notification icon
To override the small push notification icon, you can create an icon in the Client app with the nameic_kus_chat_notification.- Pass an optional backstack when the SDK launches from a push notification
By default, launching the chat widget from a push notification will do so without any app Activity on the backstack and navigating up/back beyond the root of the SDK will close it. To pass a custom backstack that leaves the end user in your app after they've navigated up/back away from the SDK, you can pass an optionalTaskStackBuilder.
Step 5. Deregister devices for push notifications
Deregister devices for new user loginsAlways deregister the device from receiving push notifications for new user logins. This ensures that the new user does not receive push notifications for any previously logged in users.
To deregister devices for push notifications, implement the following:
suspend Kustomer.getInstance().deregisterDeviceForPushNotifications{
            when (it) {
                is KusResult.Success -> it.data
                is KusResult.Error -> it.exception.localizedMessage
            }
        }
Customize push notifications
You can customize your push notifications content to redact sensitive information from within the Kustomer platform. To make these changes, go to Apps > Chat and select the Install Chat tab.