Log in and authentication
Learn how to authenticate customers securely with a JWT token.
The Chat iOS SDK does not require authentication and automatically creates a new user when a customer begins a chat.
If your app uses a login, you can use authentication to identify customers and sync customer conversations across multiple devices.
Without authentication, and by default, customers are only able to see their conversation history for a single device.
Call Kustomer.logIn with a secure JWT (JSON Web Token) token to authenticate customers through a login, sync conversation data across different devices for the customer, and allow customers to view their chat history across their devices. See Generating a JWT token for more information.
Log in as a specific user
You can call Kustomer.logIn to log in as a specific user. This authenticates the customer, loads their chat history, and clears any chats associated with the current customer.
Pass a hashed JWT payload in the Kustomer.logIn method to securely identify the customer.
When do I need to call
Kustomer.logIn?Calling
Kustomer.logInsaves an encrypted key to the iOS keychain. This saves the customer identity across all app restarts. Do not callKustomer.logIn, orKustomer.logOut, every time the app loads because this requires you to generate a new JWT on each app load.
Kustomer.logIn(jwt: "SOME_JWT_TOKEN") { result in
  switch result {
    case .success:
      print("success")
    case .failure(let error):
      print("there was a problem \(error.localizedDescription)")
  }
}
Verify if you are logged in
You can call Kustomer.isLoggedIn(userEmail: String?, userId: String?) to see if a particular user is logged in using the email address or externalId that you passed in the login JWT. This function would return true if you are already logged in as the given user, and false if you are not. You can then log them in if they are not.
When picking which option to choose, use the parameter that was used to log in the last time.
let userIsLoggedIn = Kustomer.isLoggedIn(userEmail:"[email protected]", userId:nil)

or

let userIsLoggedIn = Kustomer.isLoggedIn(userEmail:nil, userId:"1234")
Note
If you pass both the
externalIdin yourloginJWT, theexternalIdwill not be used for the user.
Generating a JWT token
To ensure that the JWT token is secure, you need to generate the JWT token on your backend server before you pass the token to your frontend to use the token with the Kustomer.logIn method.
We'll show you how to generate a secret key with your Kustomer API key and how to use the secret key to generate a secure JWT token with an approved JWT token verification library.
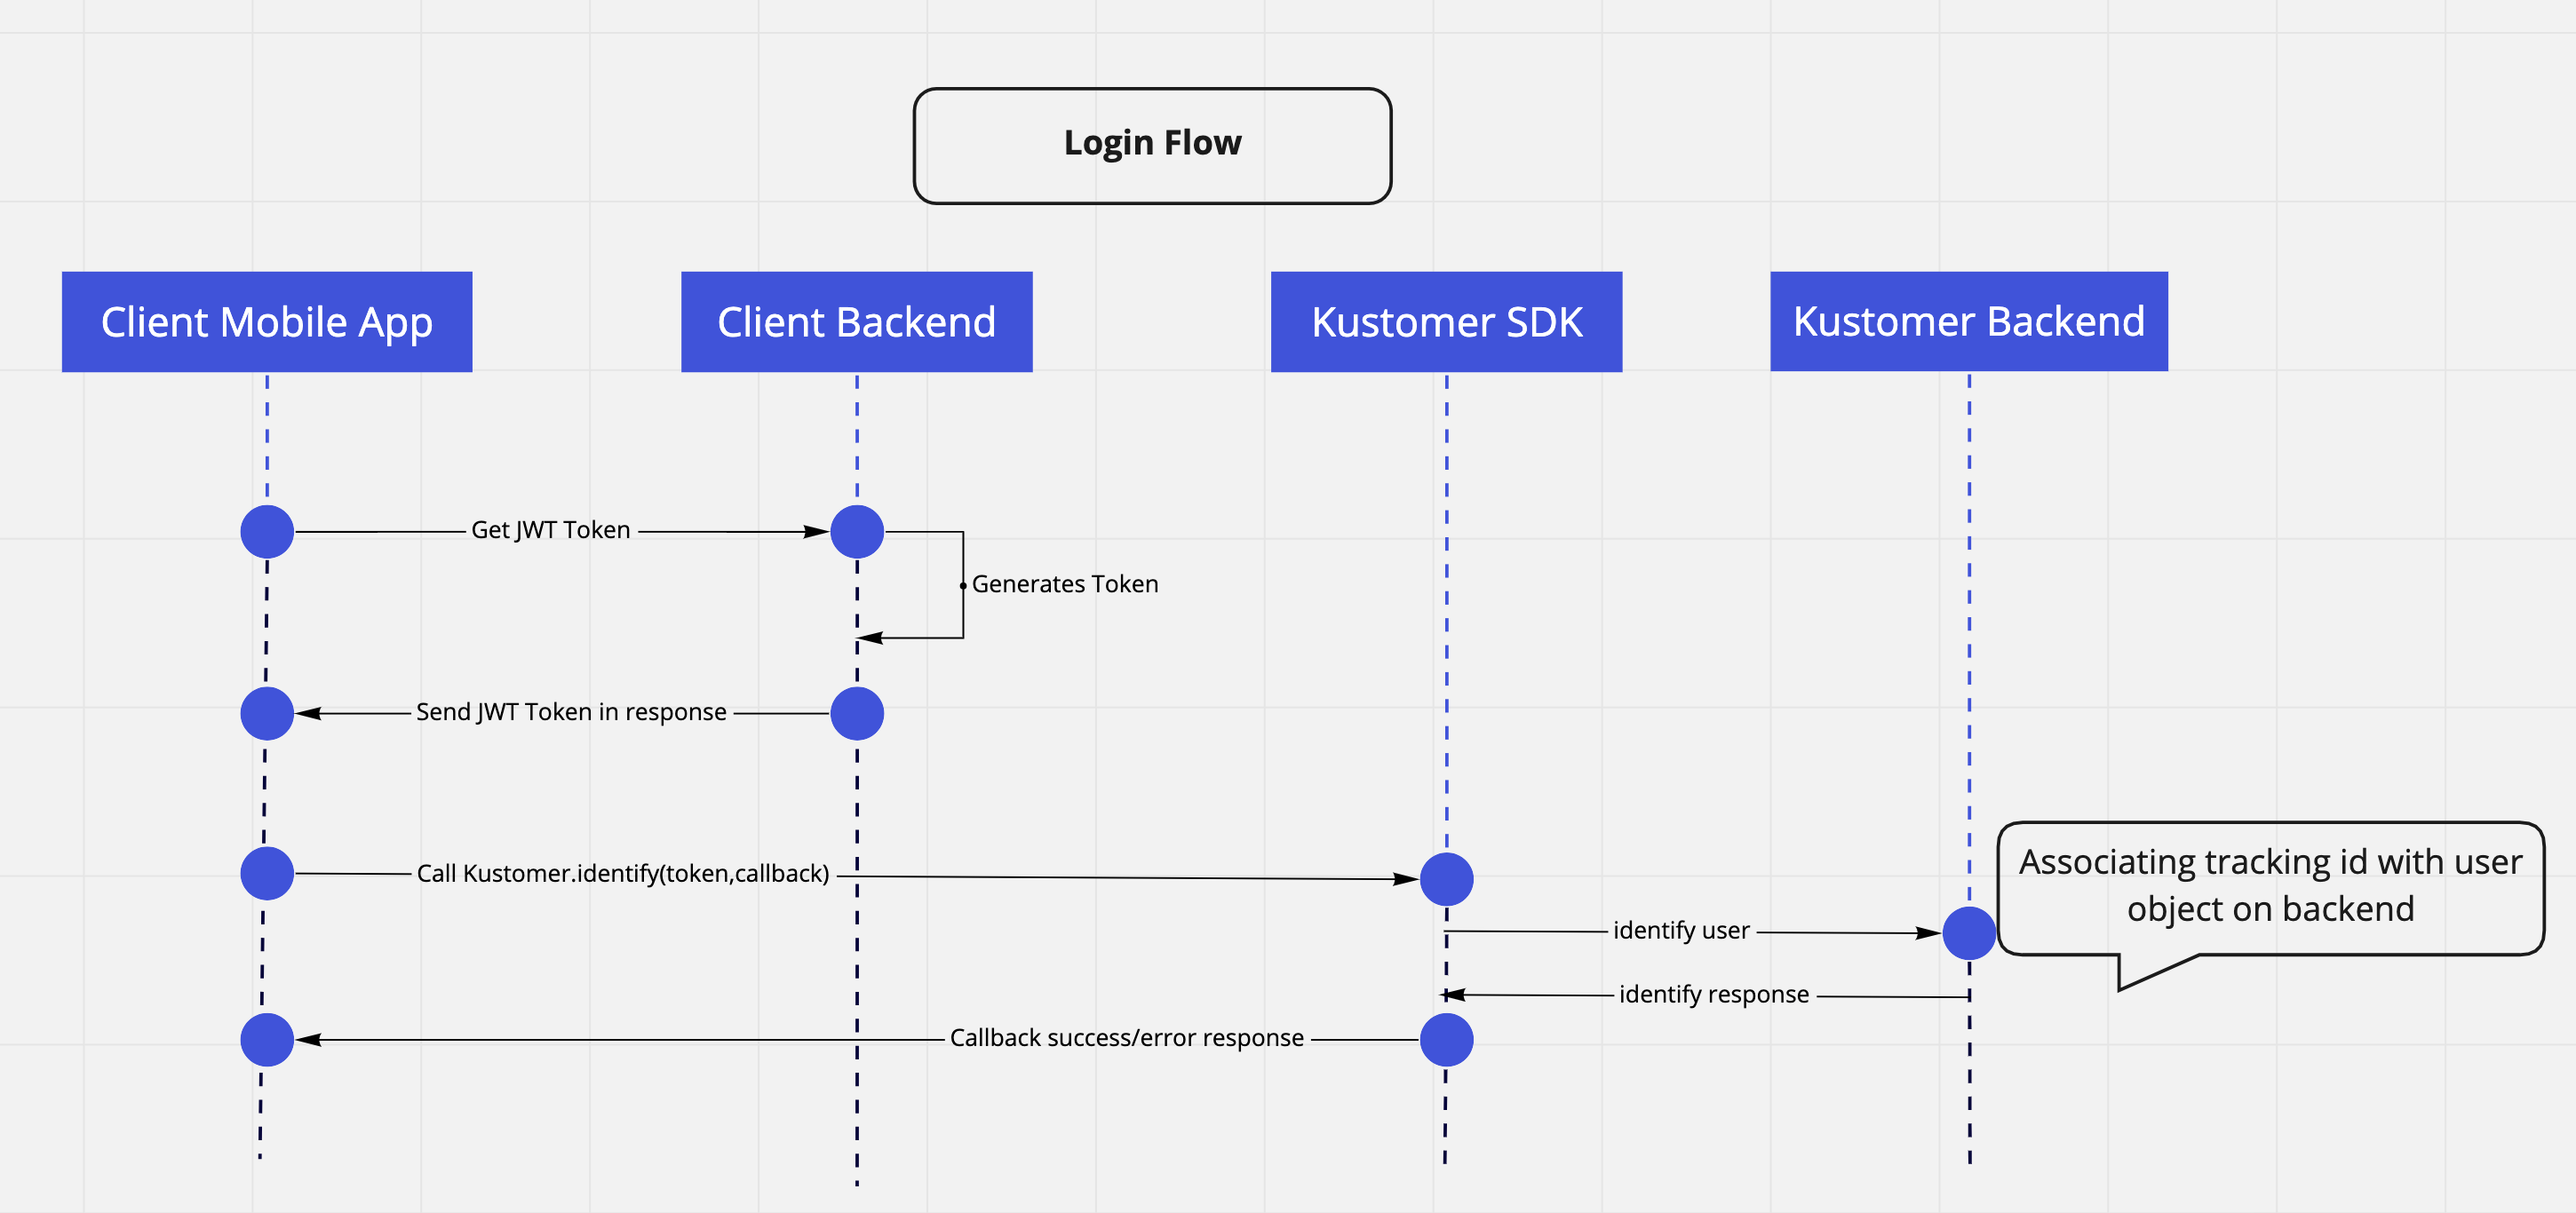
The diagram below explains the overall flow for authenticating a user.

Diagram of user authentication flow.
Prerequisites
Before you get started, you'll need the following:
- Admin permissions or access to generate API keys in Kustomer
- Your organization name in the Kustomer app URL (for example,
https://<organization-name>.kustomerapp.com.) - Access to Postman or another tool to make API calls
- An approved JWT token verification library for your server language or framework.
Step 1: Generate a new Kustomer API key
First, we'll create a new Kustomer API key to use to make an API call to generate a secret key.
To generate a new Kustomer API key:
-
Create a new API Key for your Kustomer organization. Go to Settings, and select Security > API Keys > Add API Key.
-
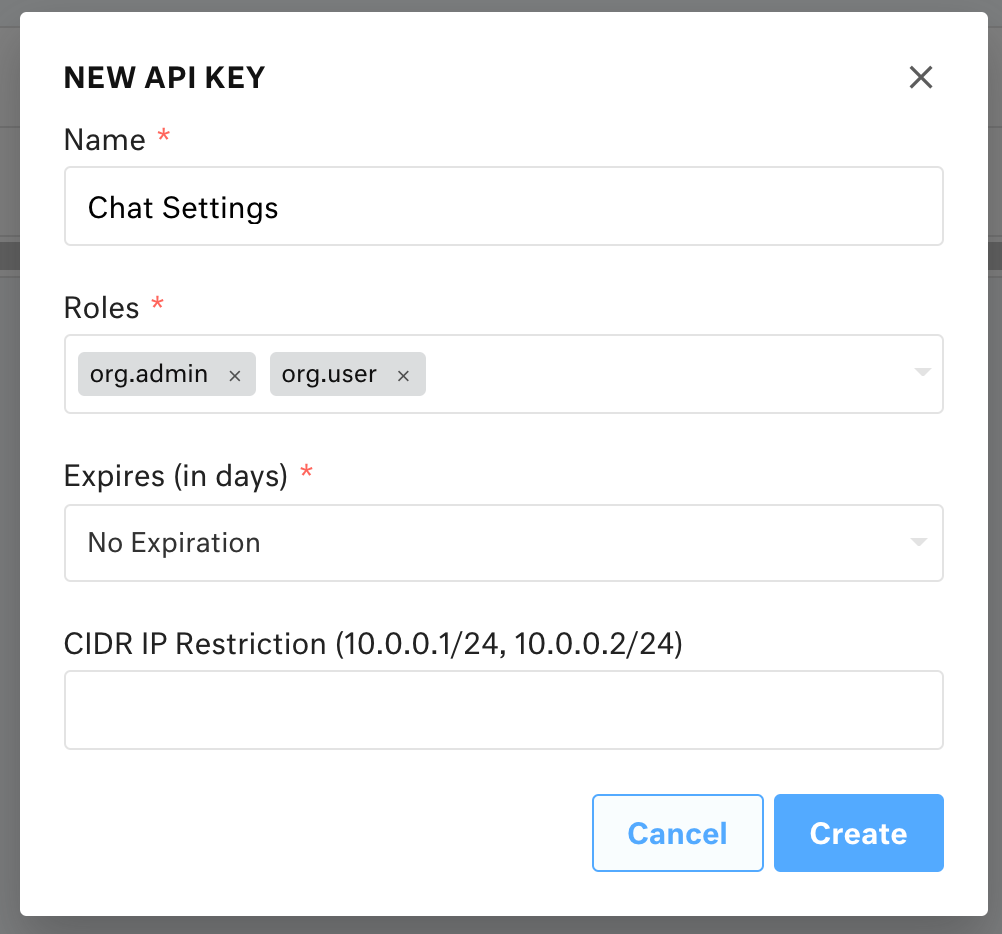
Enter a descriptive name for for your API key (for example, Chat Settings). Set Roles to both
org.adminandorg.user. Set Expires (in days) to "No Expiration". -
Select Create to generate a the new API Key. Save your API key is a secure location to request a secret key with the Kustomer API.

New API key modal. Settings displayed are Name: Chat Settings; Roles: org.admin, org.user; Expires (in days): No Expiration.
Once you have a new Kustomer API key with org.admin and org.user roles, you are ready to request a secret key from the Kustomer API.
Step 2: Generate a secret key
Next, we'll use Postman to submit the following GET request to the Kustomer API:
To generate a secret key:
- Replace
ORG_NAMEwith your organization name as it appears in the Kustomer app URL (for example,https://<organization-name>.kustomerapp.com.).
This authenticates the customer and loads their chat history. It clears any chats associated with the current customer.
See here for how to generate a JWT
https://ORG_NAME.api.kustomerapp.com/v1/auth/customer/settings
- In the request header, replace
API_KEYwith the API key you created in the previous step.
{
     "Content-Type": "application/json",
     "Authorization": "Bearer API_KEY"
 }
-
Submit the
GETrequest:https://ORG_NAME.api.kustomerapp.com/v1/auth/customer/settings.Your response will include a JSON object with a secret key where
SECRET_KEYrefers to the secret key to use to sign the JWT token:
{
     attributes: {
       secret: 'SECRET_KEY'
     }
}
- Store your secret key server-side (for example, as an environment variable).
Once you have a secret key, you are ready to generate a secure JWT token.
Store your secret key server-side
Always generate the JSON Web Token (JWT) server-side before you pass the token to the client SDK. Never store the token client-side. This helps secure customer chat histories and ensure that your secret keys stay private.
Step 3: Generate a secure JWT token
Finally, use an approved JWT token verification library listed in JWT Libraries for Token Signing/Verification for your server language or framework. We've provided an example for NodeJS at the end of this step. Learn more about JWT token verification on the JWT site.
JWT tokens contain a header and a payload. Kustomer expects a header and payload similar to the following examples:
Header for JWT token
The JWT used for secure identification must use HMAC SHA256 and include the following header and claims:
{
  "alg": "HS256",
  "typ": "JWT"
}
Payloads for JWT token
You can use the externalId or the customer email to sign the JWT token:
externalIdThe proprietary identifier that you set on customer profiles to reference them in your own database.
If you provide both
externalId, email will have priority.
iatThe issued at time for the JWT token.
The
iatfor a token must be within 15 minutes or the token will be invalid.
You can identify customers with an ID from your proprietary database. This will identify a customer in Kustomer given that a customer profile in Kustomer exists with the given externalId.
{
  "externalId": "user_id",
  "iat": "CURRENT_TIME_UTC"
}
You can also include the customer email in your payload to identify customers by their email.
{
  "email": "CUSTOMER_EMAIL",
  "iat": "CURRENT_TIME_UTC"
}
Example: Generate a secure JWT token with NodeJS
Here's an example of how to generate the signed JWT token in NodeJS with jsonwebtoken:
var jwt = require('jsonwebtoken');

// An `iat` is not required because `jsonwebtoken` auto-generates one

var token = jwt.sign({
  externalId: 'user_id'
}, 'SECRET_KEY', {
  header: {
    alg: 'HS256',
    typ: 'JWT'
  }
});
Once you have a secure JWT token, you can use the token to authenticate customers with Kustomer.logIn.
Use
logInandlogOutinstead ofidentifyCurrentCustomer(deprecated)We've deprecated
identifyCurrentCustomer. UselogIn()orlogOut()followed by logIn() instead.
Updated almost 2 years ago