Push keys and certificates
Learn how to get push keys from your Apple Developer account and generate push certificates to turn on push notifications for your iOS app.
This guide shows you how to create push certificates and generate a keyset to turn on push notifications for chat.
Prerequisites
You'll need the following before you can get push keys and certificates:
- Access to your team Apple Developer Program account.
- Explicit bundle identifiers, or bundle IDs, for each app you want to create and send push certificates for. Wildcards won't work.
- Admin permissions for your Kustomer organization to change Chat Management: SDK settings.
Part 1. Get push keys and push certificates
To generate a push certificate, download your push key. Once you create a push certificate, turn on push notifications for your app identifier. After you confirm your push certificates, you'll add your push certificates to your Mobile SDK settings in Kustomer.
Step 1. Create and download your push key
Go to the Certificates, Identifiers & Profiles page for your Apple Developer account, and select Keys > Register a New Key > Apple Push Notifications service (APNs).
Create and download your Apple Developer account-wide push key as a .p8 file.
- You can access your Team ID from Membership in the Program Resources navigation of the Apple Developer portal.
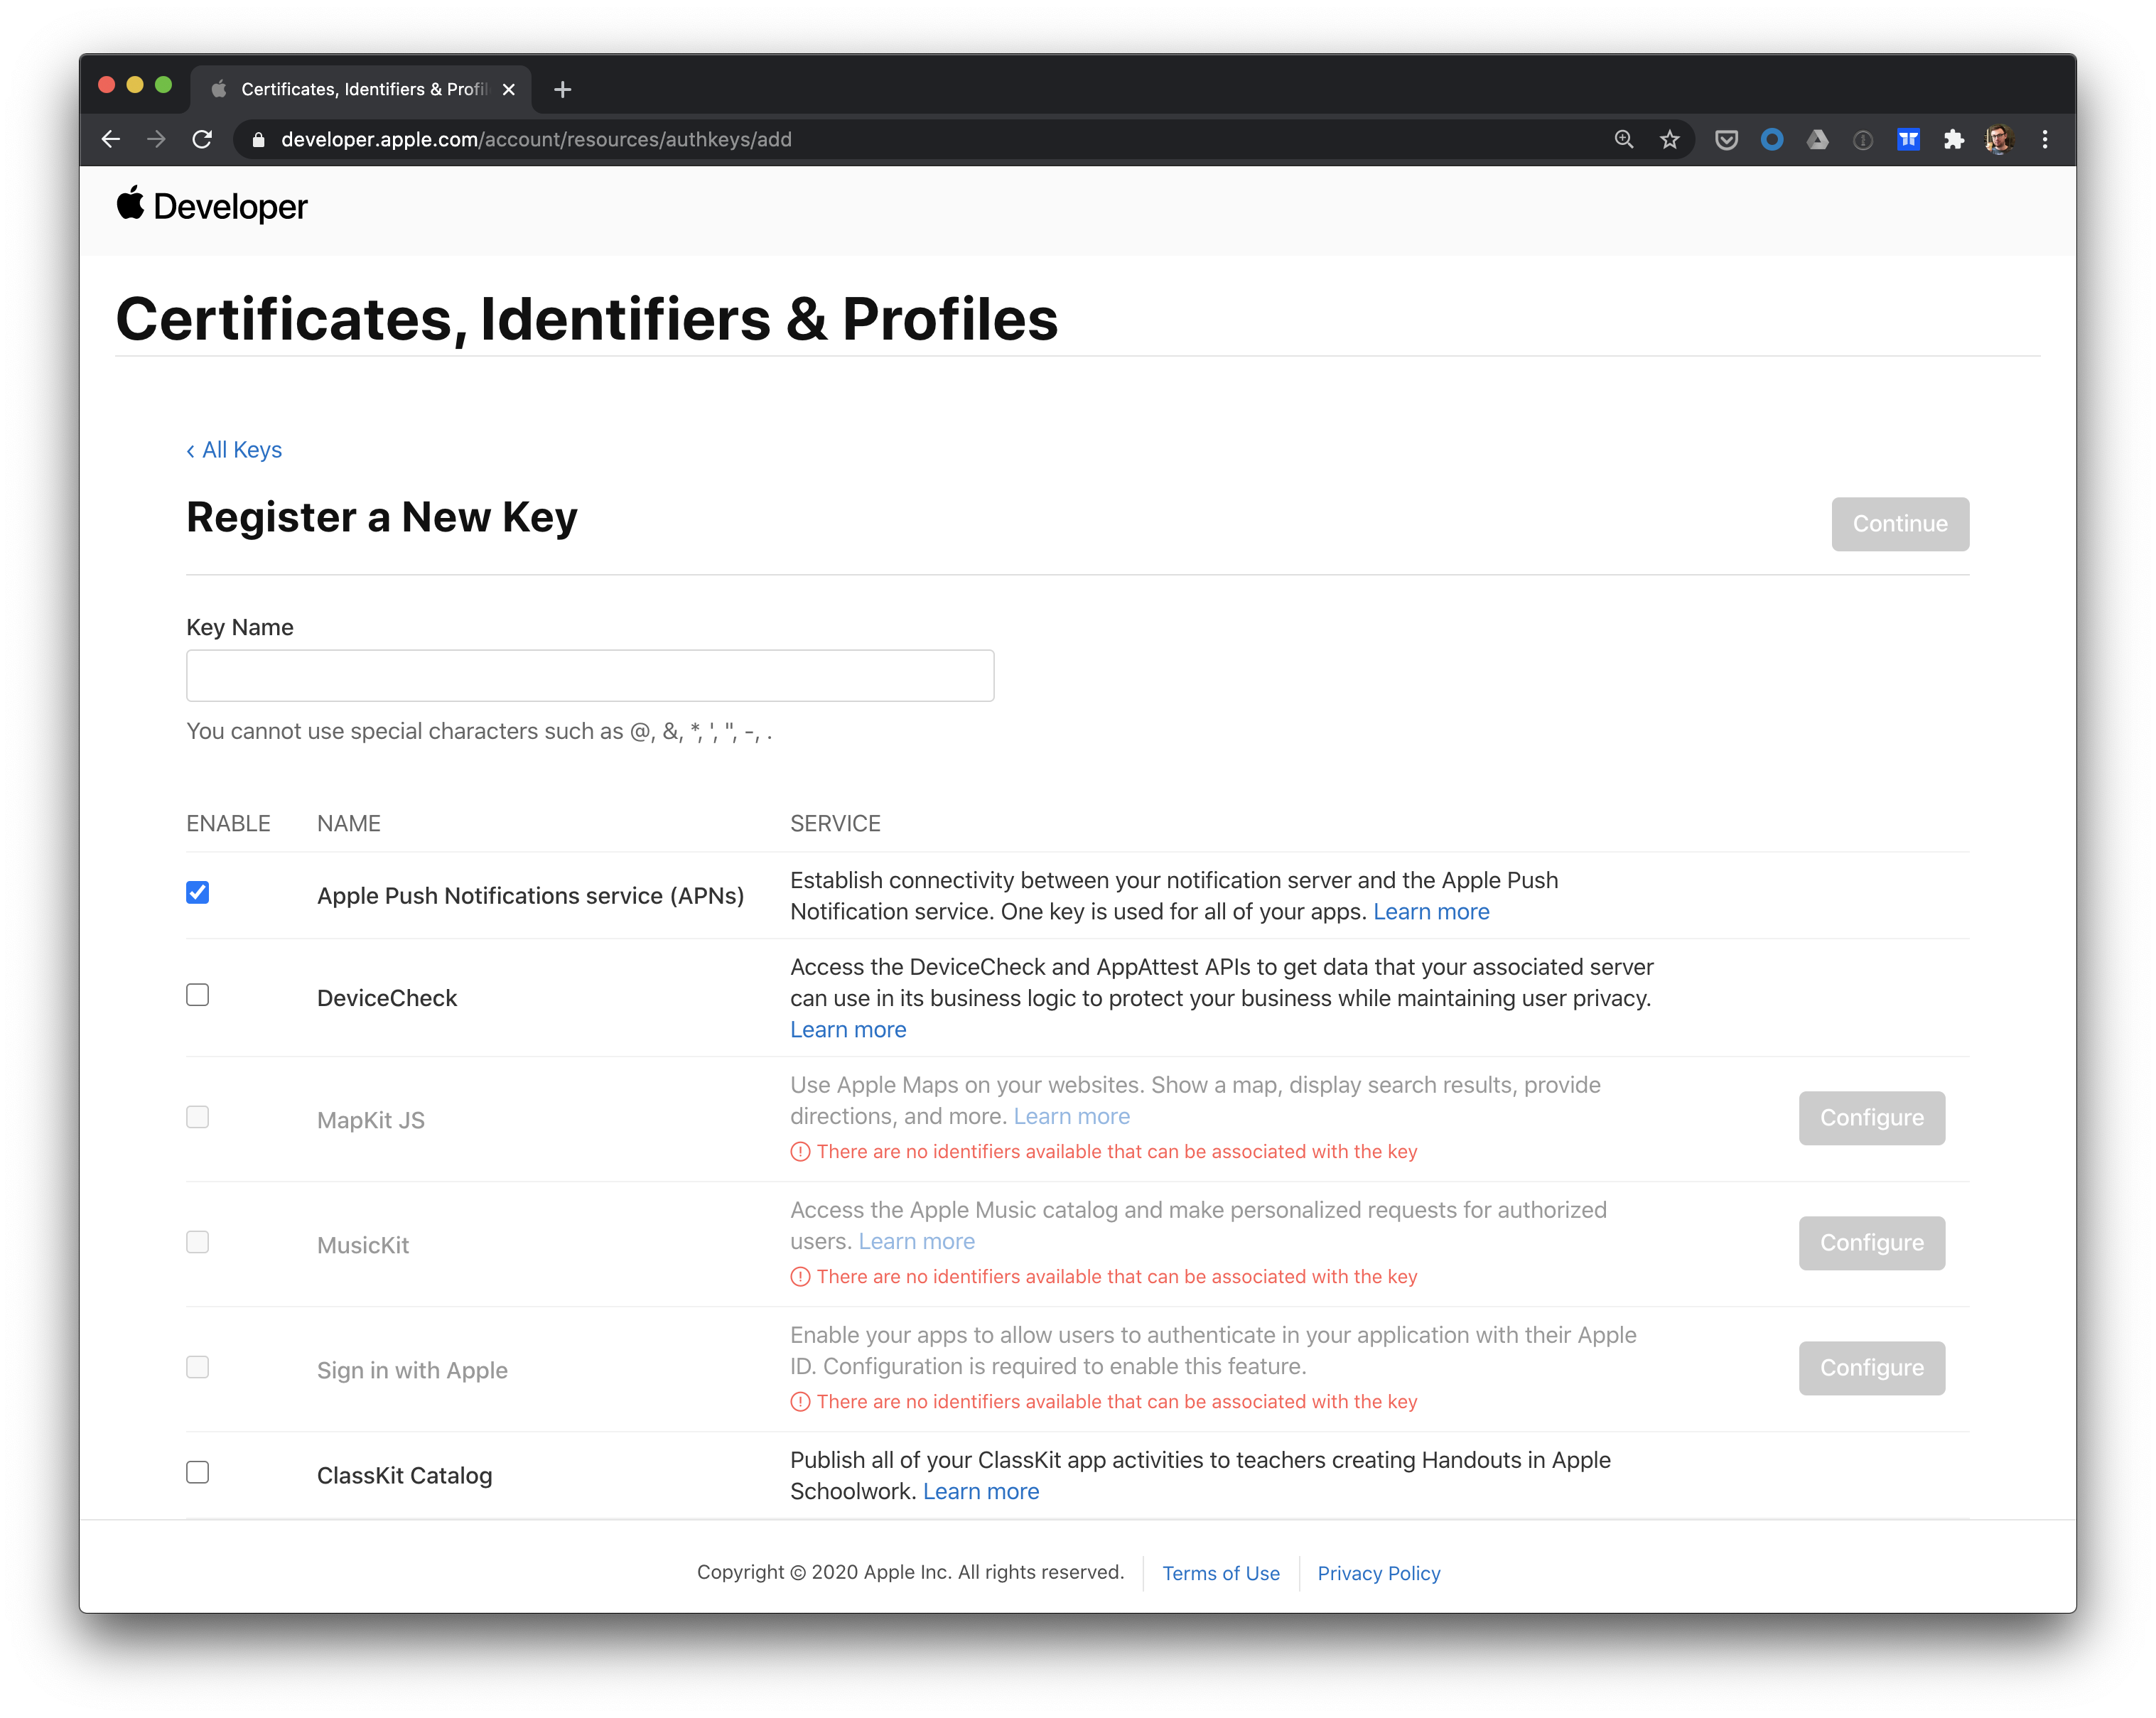
Register a new push key on the Apple Developer portal.
Step 2. Create a push certificate
To create a push certificate with the generated push key, go to the Certificates, Identifiers & Profiles page for your Apple Developer account, and select Certificates > Create a New Certificate > Apple Push Notification service SSL (Sandbox & Production).
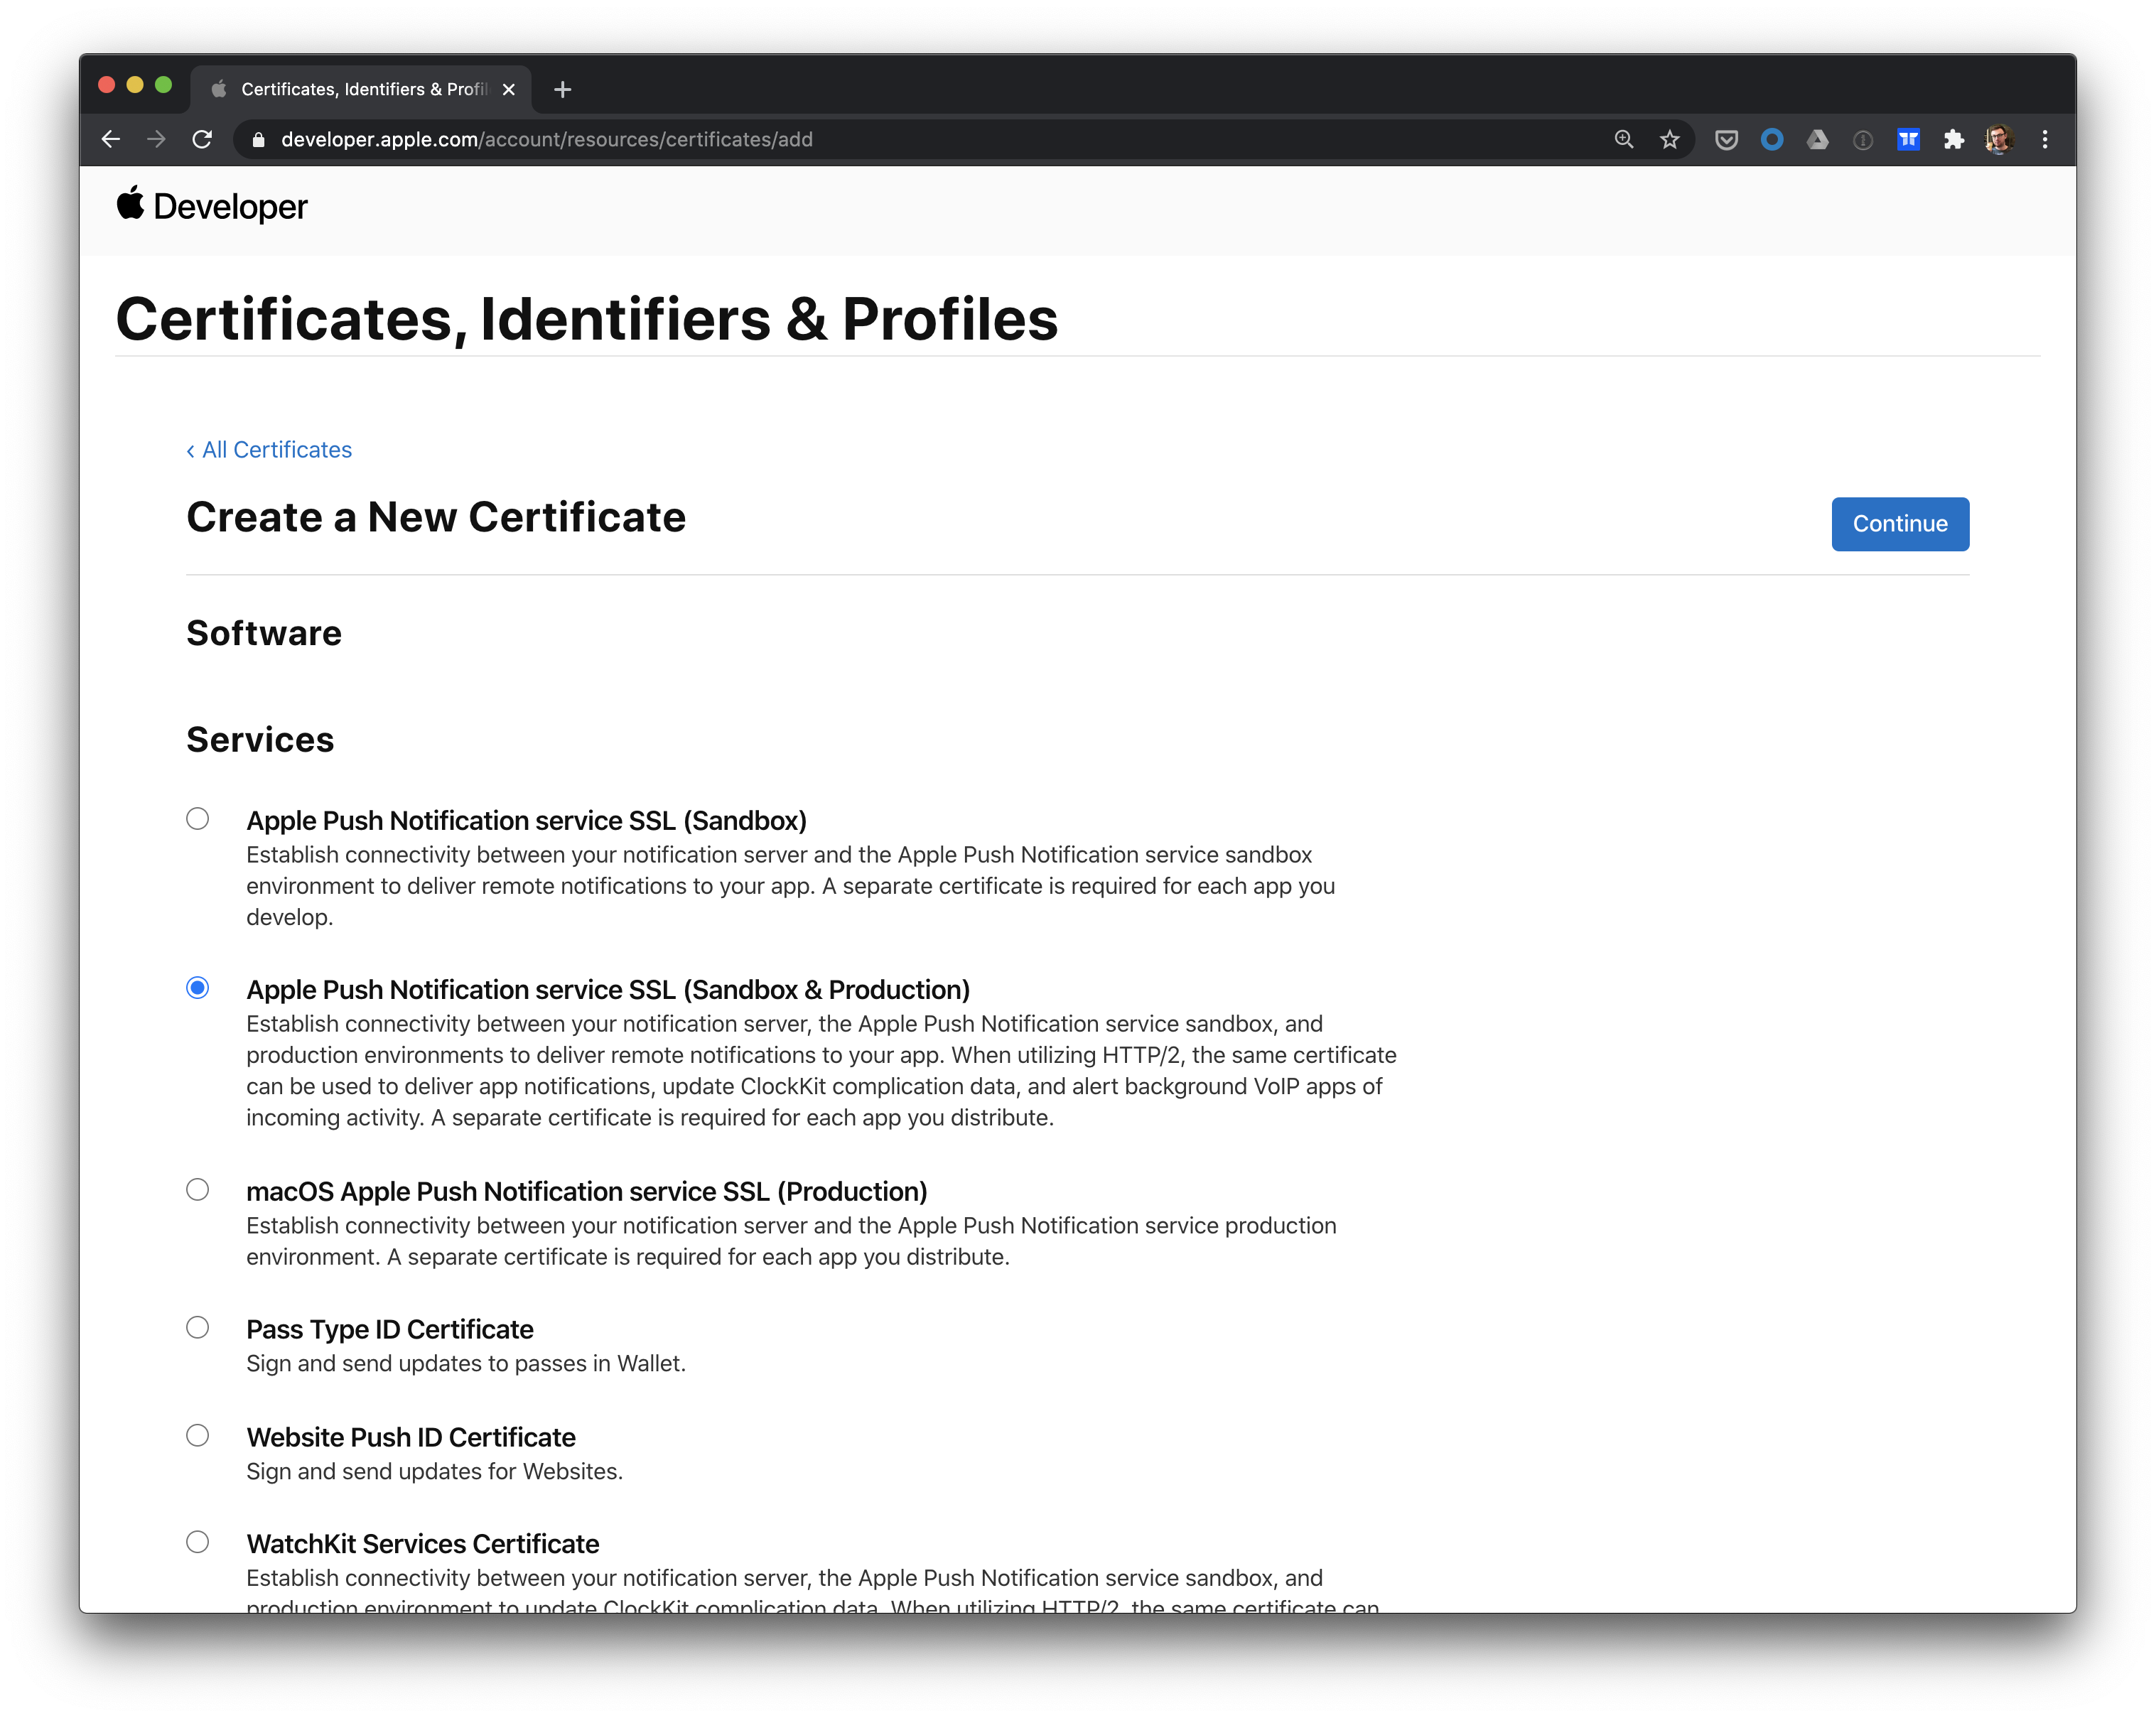
Create a certificate for the Apple Push Notification service SSL (Sandbox & Production).
Create a push certificate for each app bundle ID
Use your push key to create a push certificate for each app bundle ID.
Always keep your push certificates private and secure.
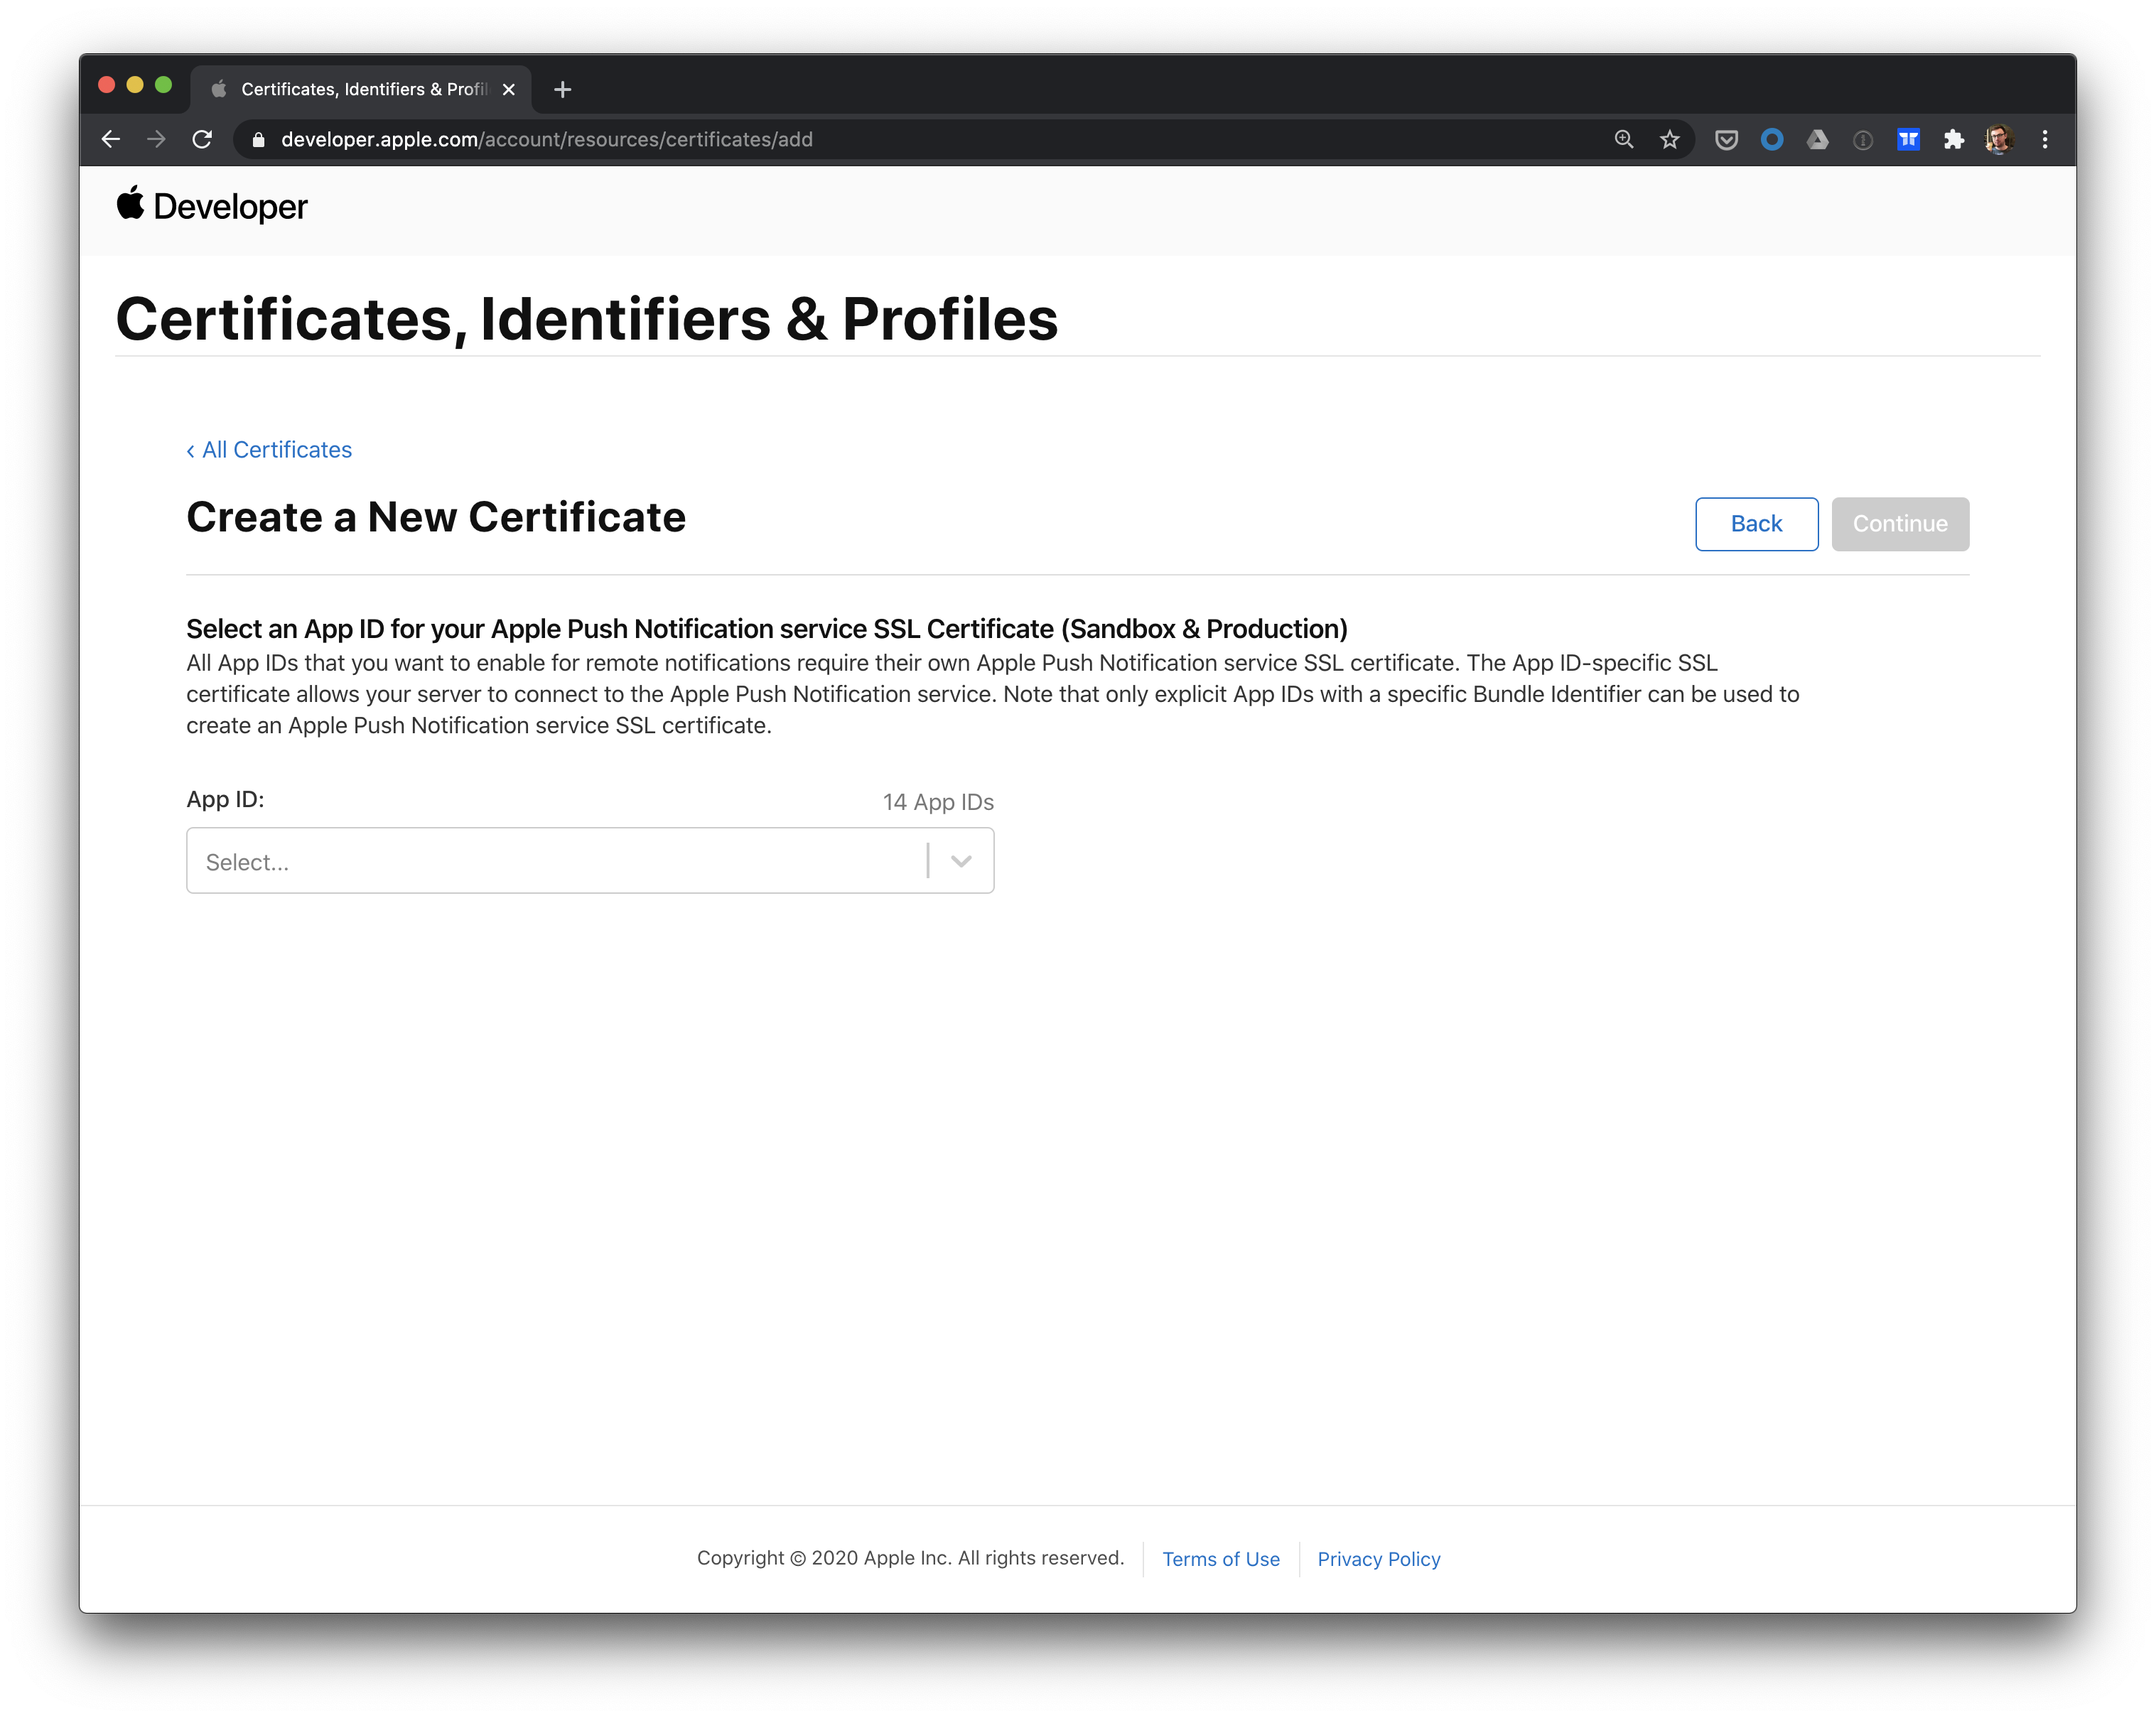
Create a push certificate for each app bundle ID.
Step 3. Turn on push notifications for your app identifier(s)
After you create the push certificate for the related app identifier, turn on push notifications for the app in the app identifier.
You can turn on push notifications in Xcode or on the Apple Developer portal.
Step 4. Confirm your push certificates
After you enable push notifications for your app, check that the related push certificate shows up for the Push Notifications capability for your App ID Configuration on the Apple Developer portal.
To check your push notification certificate, go to the Certificates, Identifiers & Profiles page for your Apple Developer account, and select Identifiers > Edit your App ID Configuration for the relevant app.
Under the Capabilities section, find Push Notifications and select Edit to view your APNs SSL certificates.
Once you confirm the relevant push certificates for each app bundle ID, head on over to Part 2. Send push keys and certificates to Kustomer.
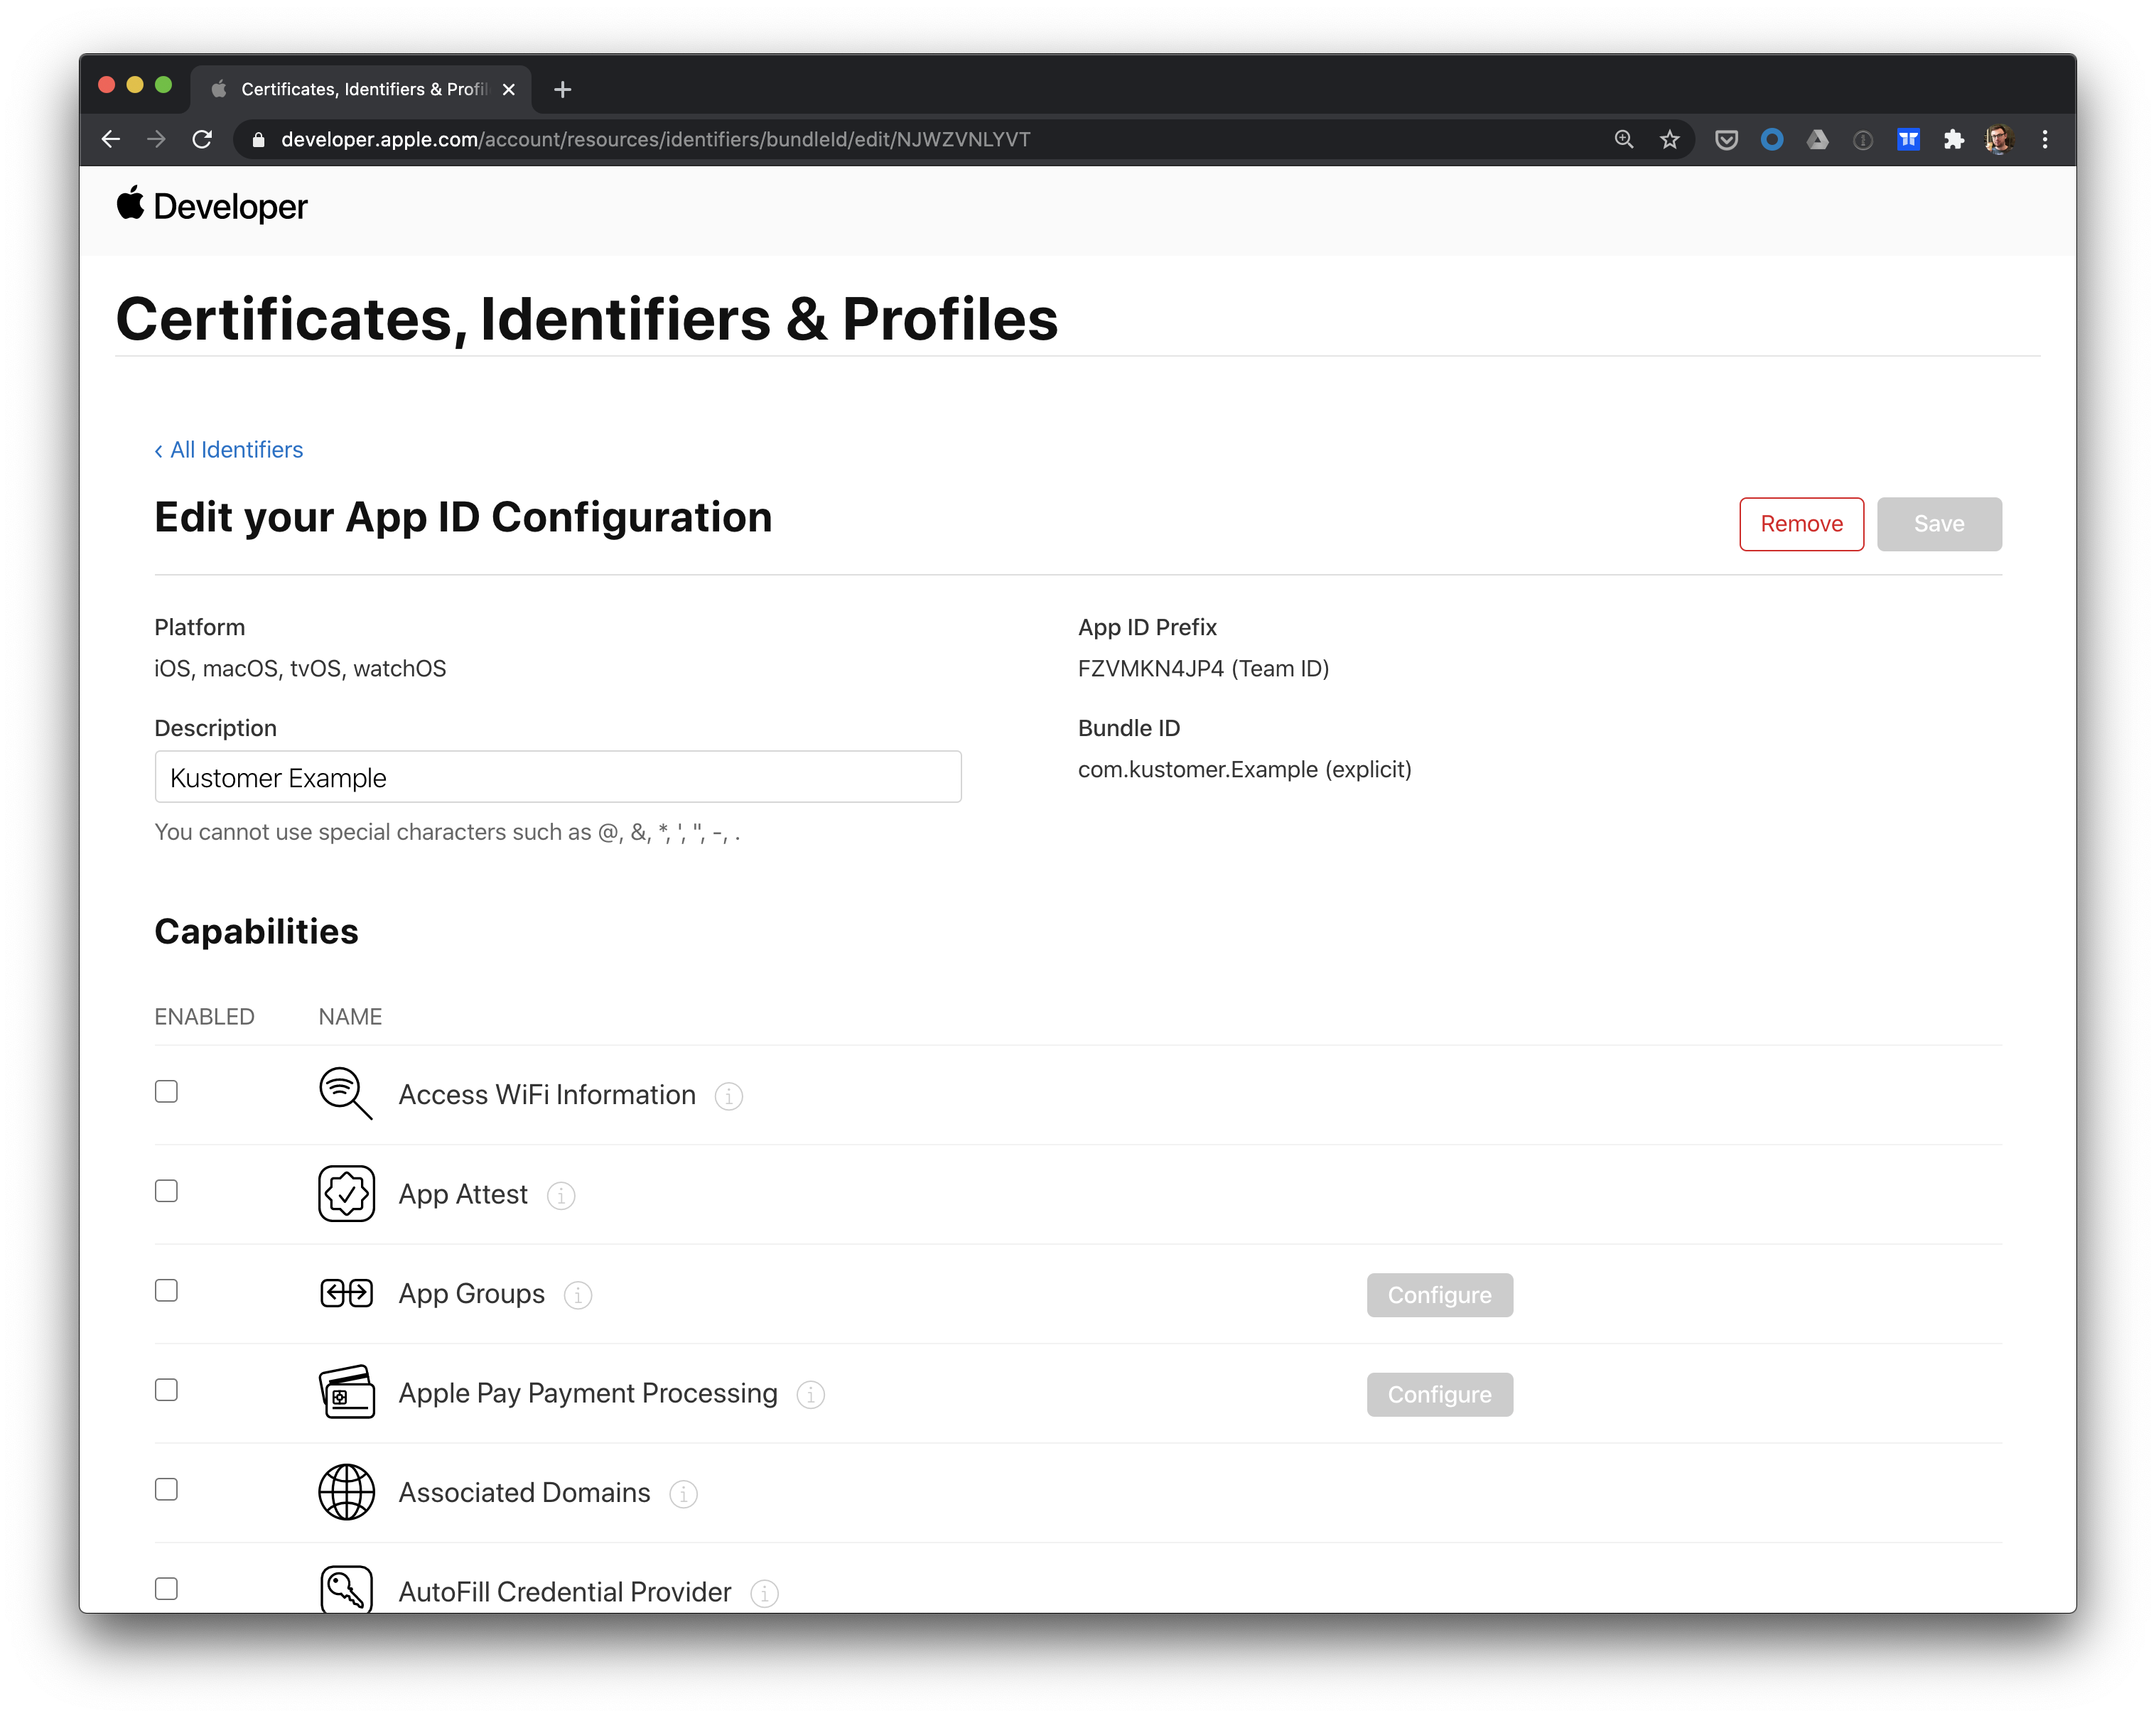
Edit your app ID configuration in the Apple Developer portal.
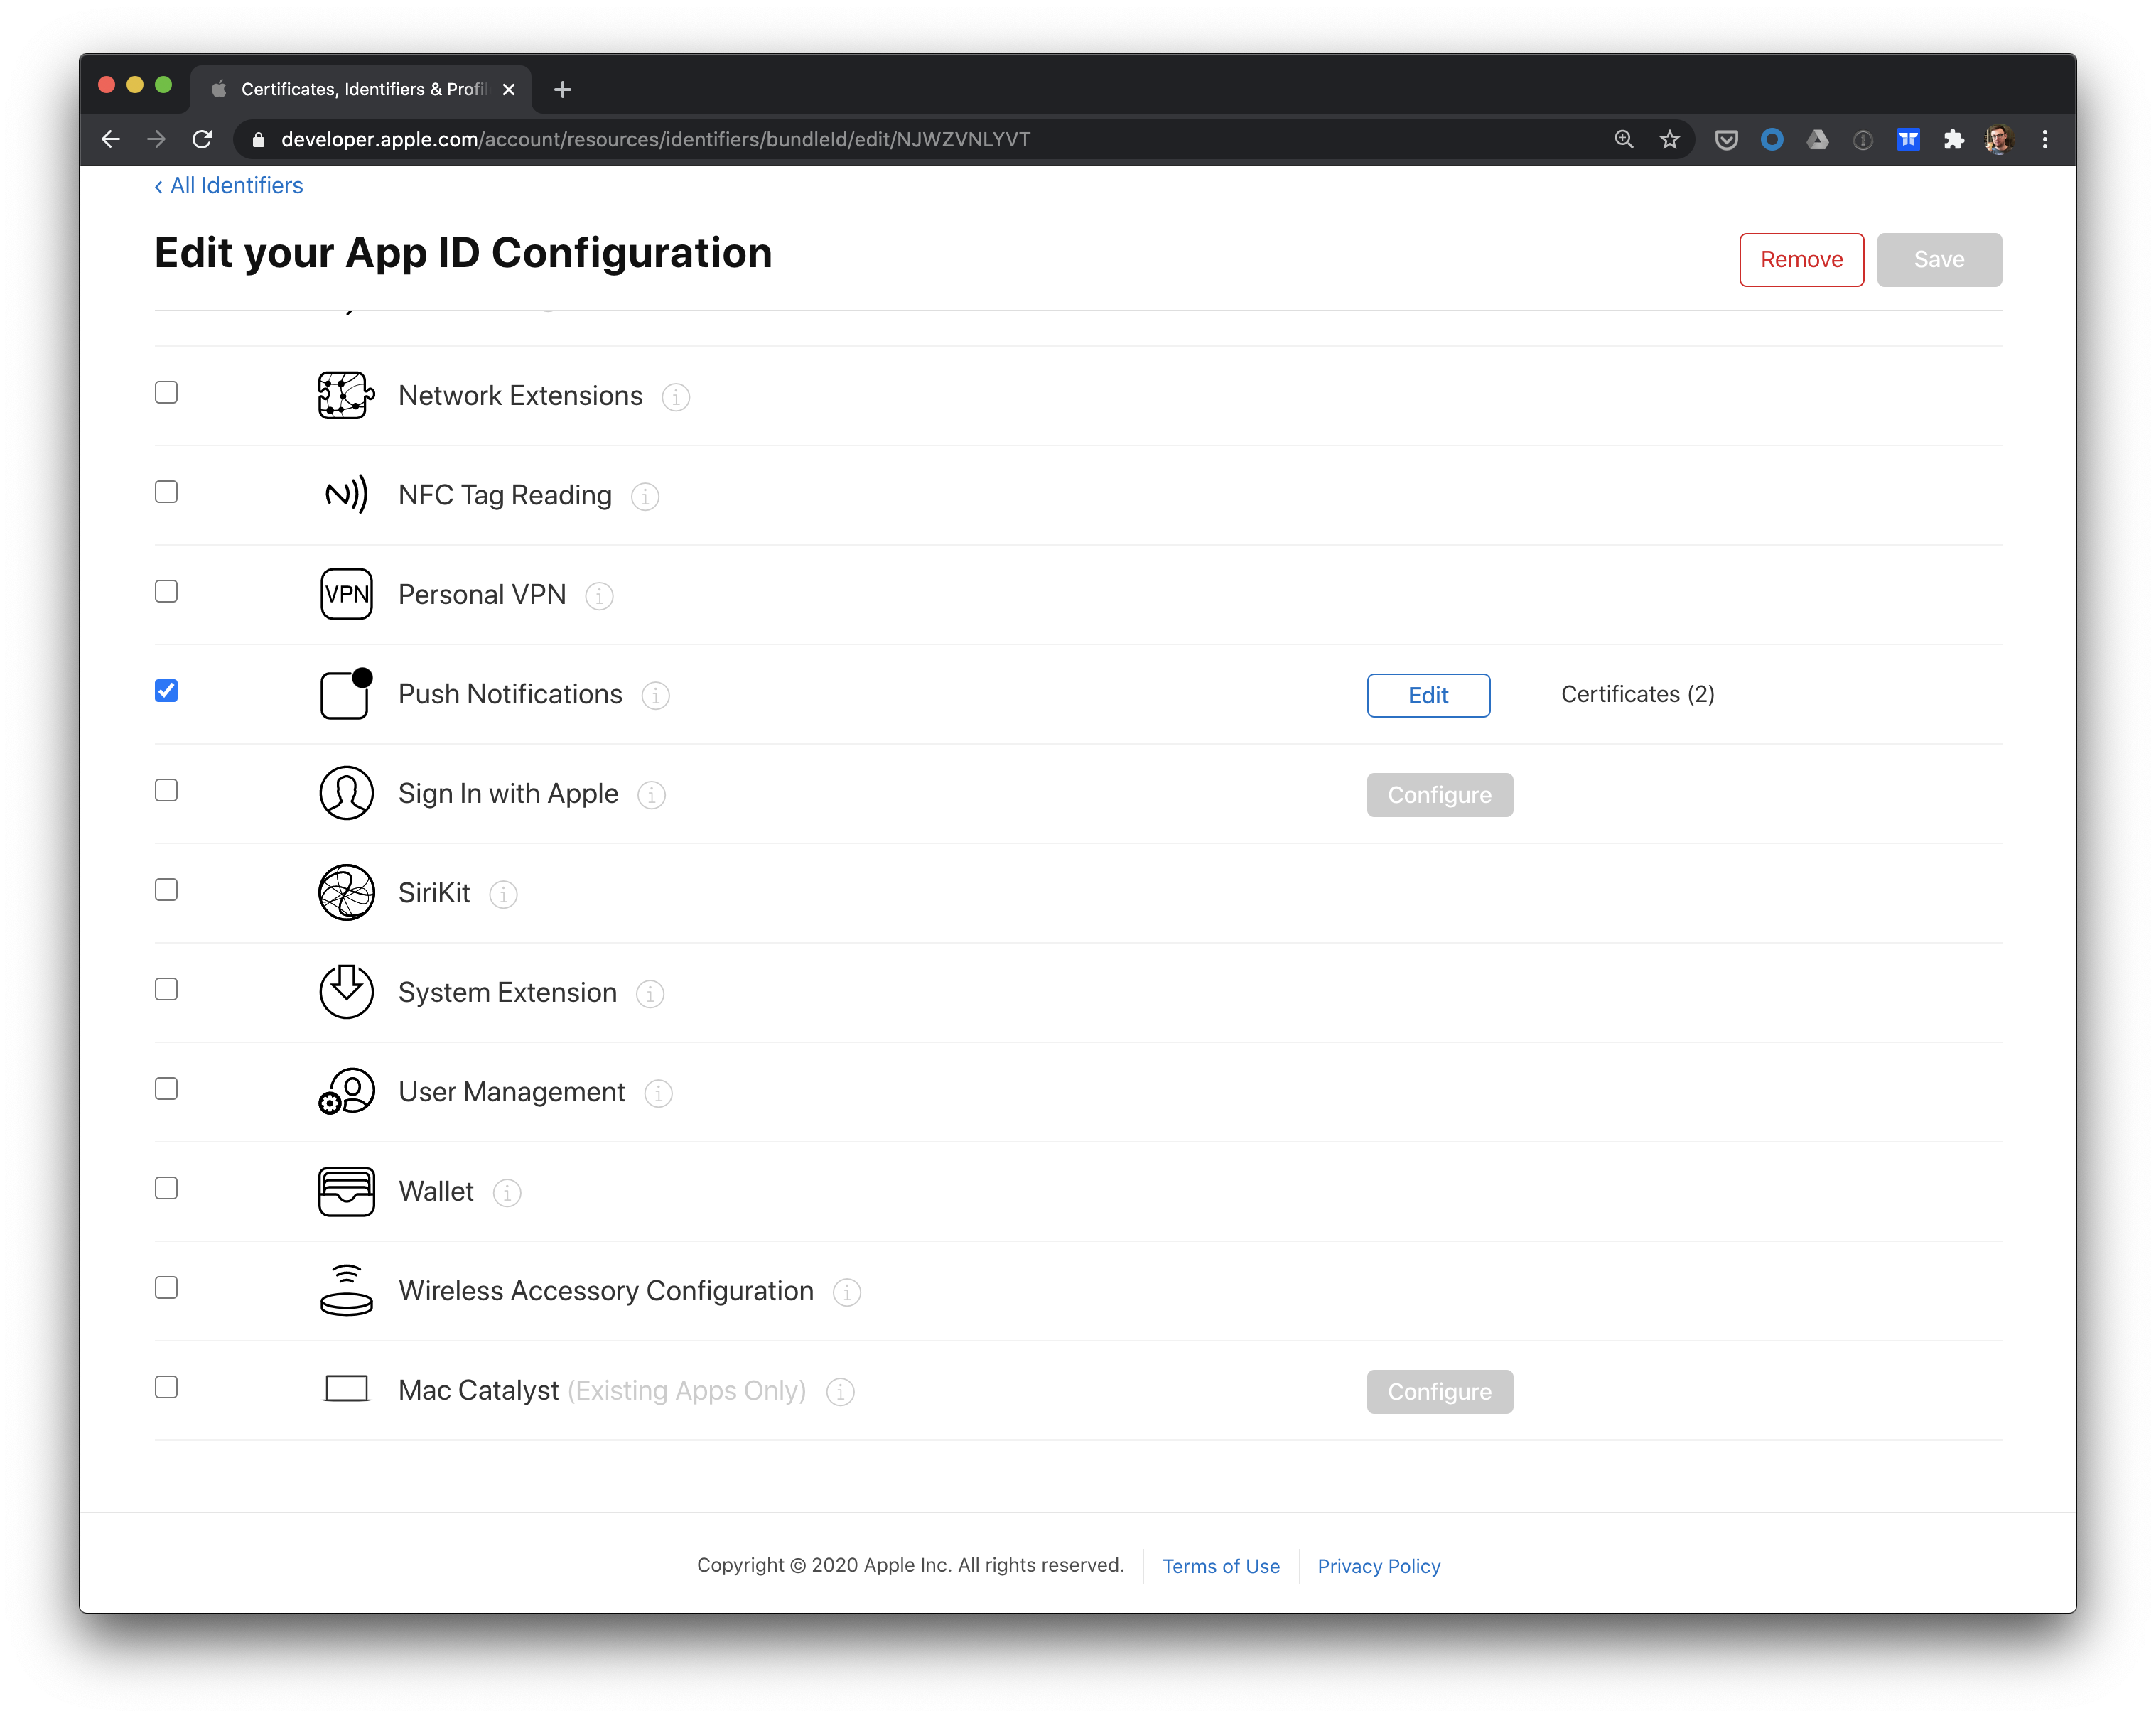
The Push Notifications capability listed under the Edit you App ID Configuration page.
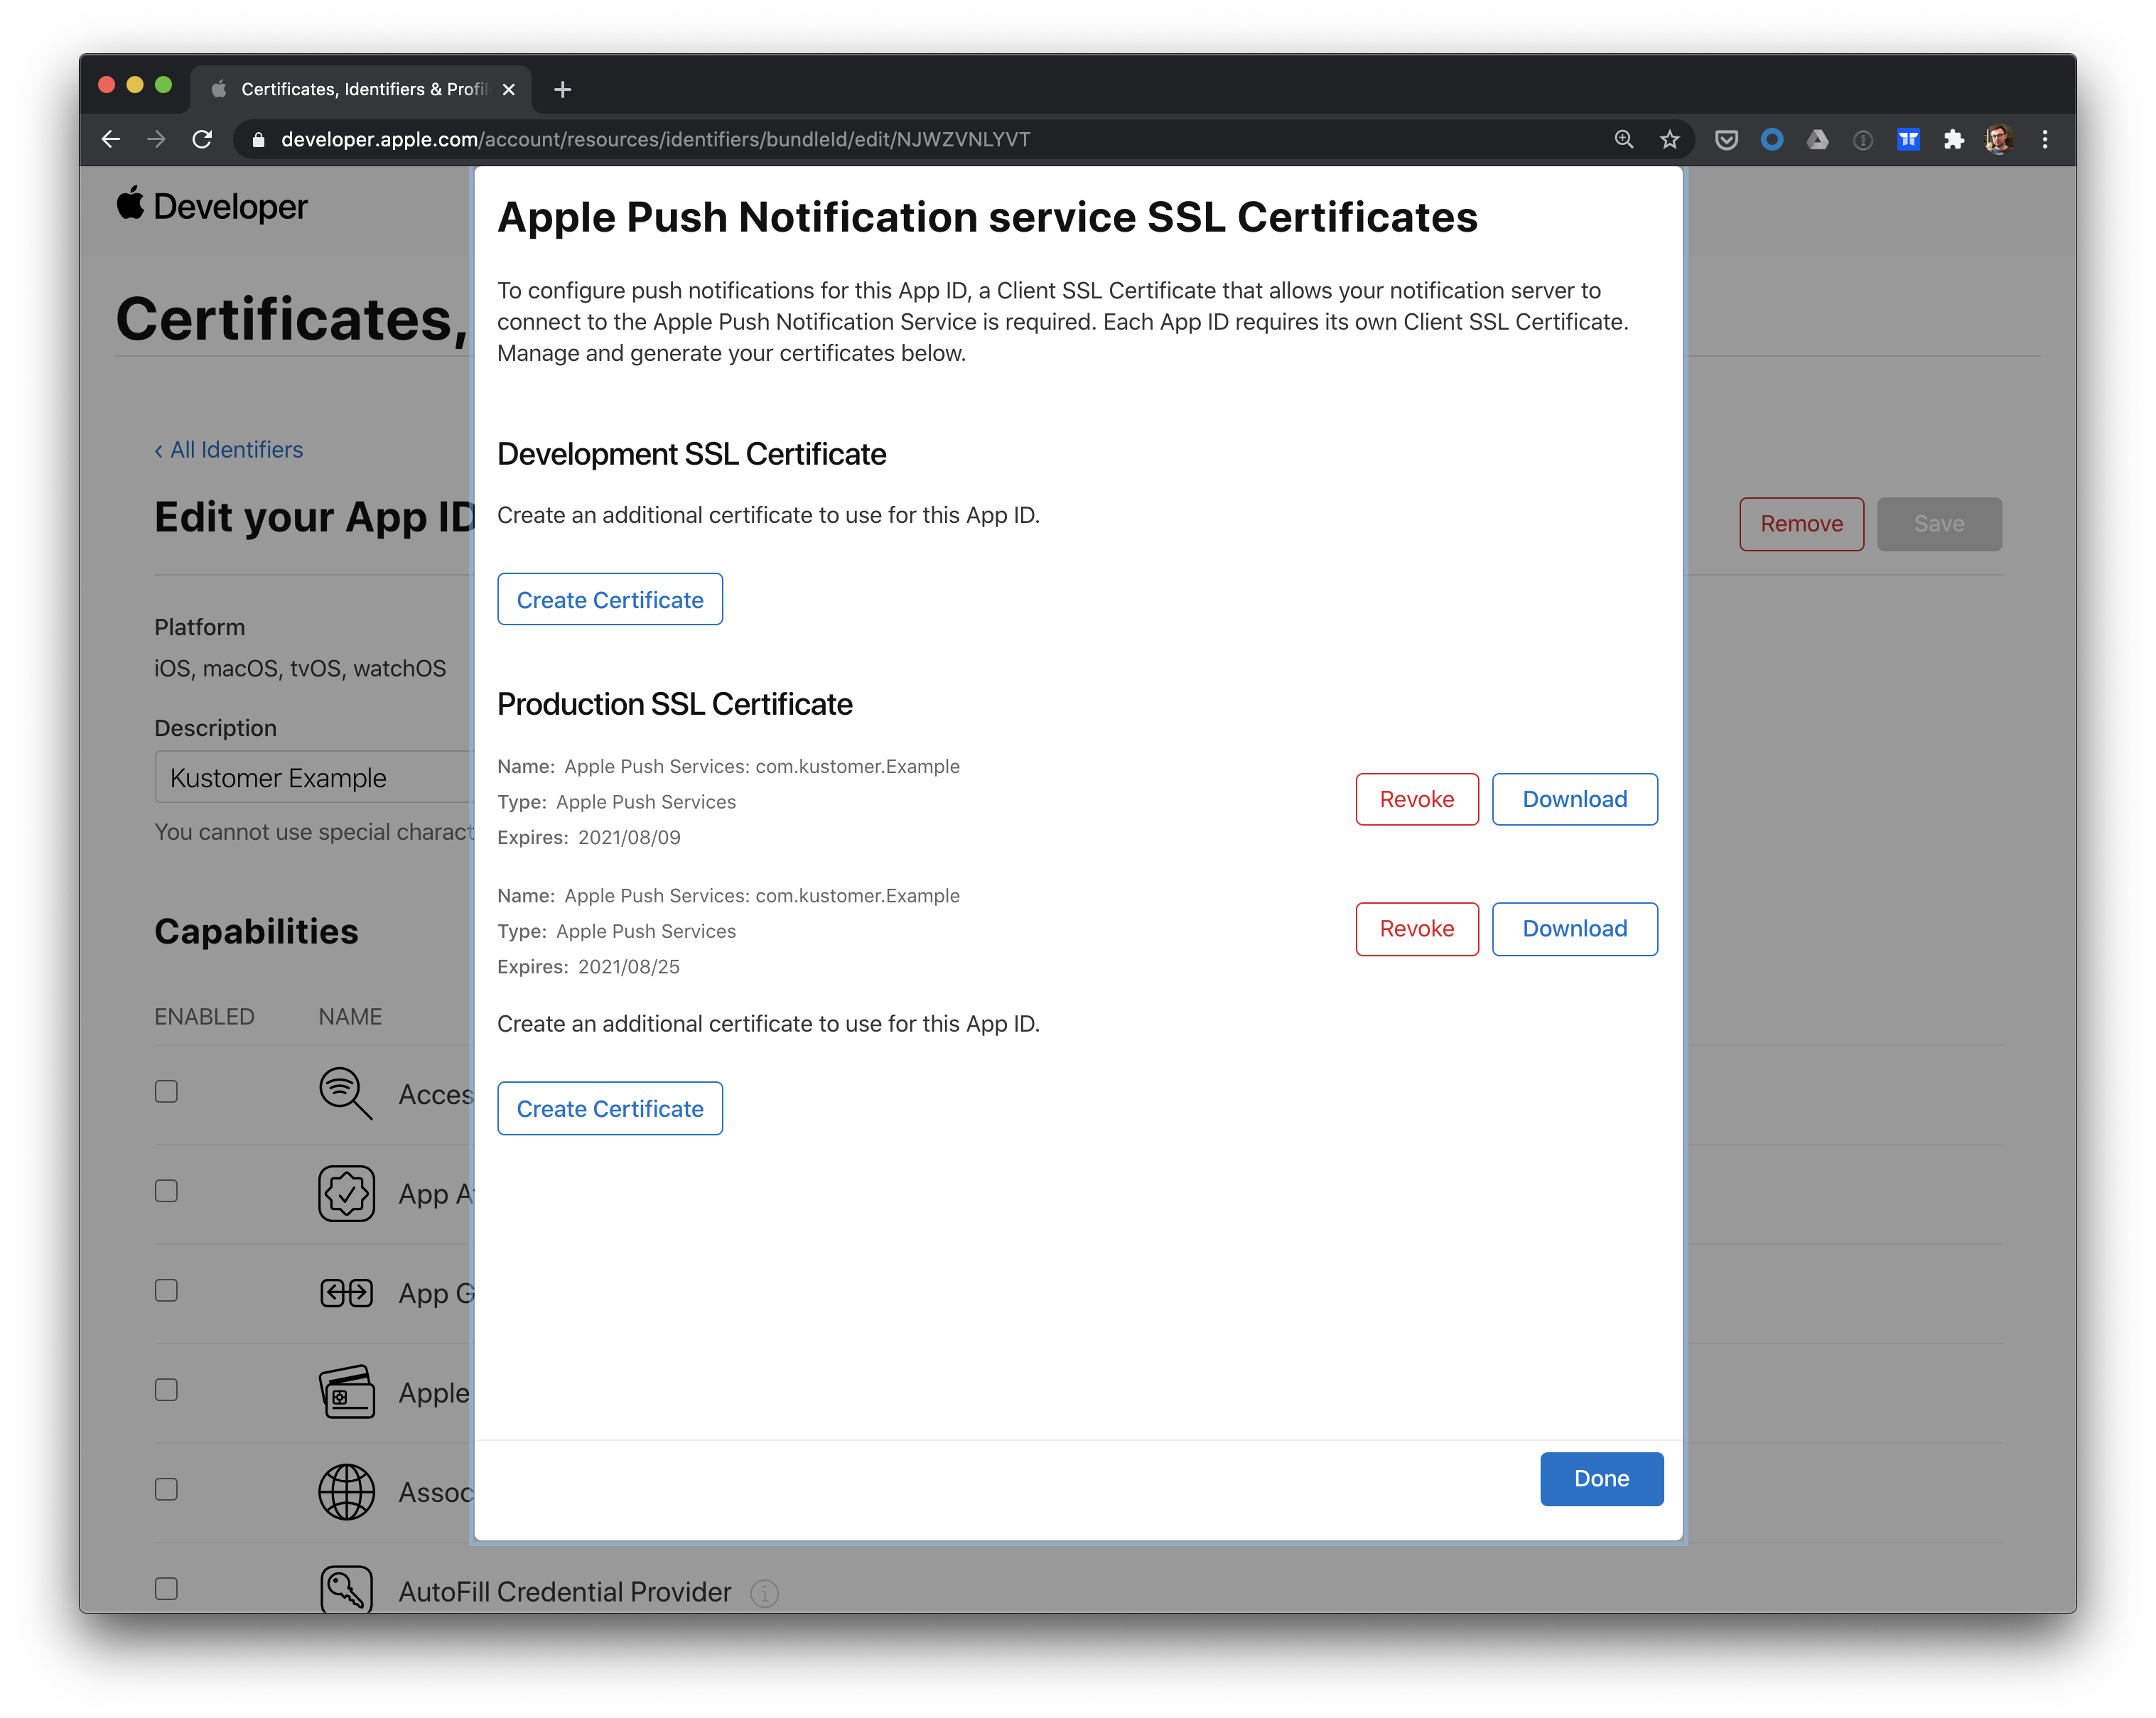
Confirm that the certificate you created in Step 2 is listed for your app.
Part 2. Add push keys and certificates in Kustomer
After you create your push keys and push certificates, go to your Kustomer Apps, and select Chat to open the Chat Management settings page. Select the SDK tab to view your Chat SDK settings.
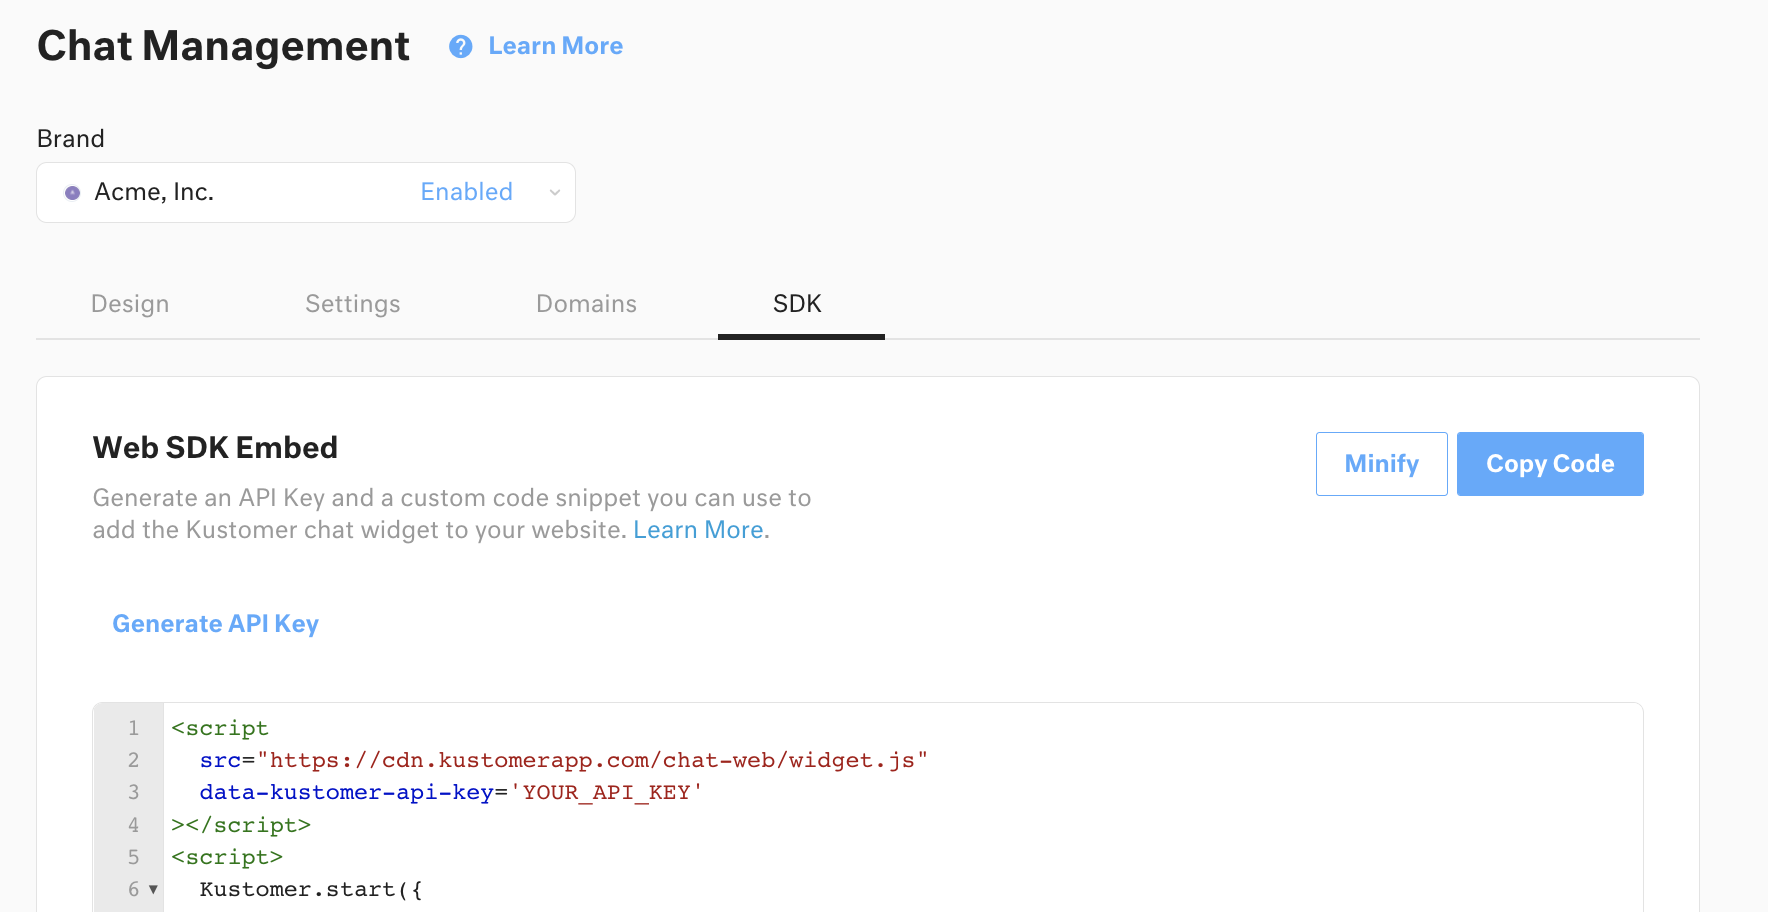
Chat Management: SDK settings in Kustomer.
You'll see the Mobile SDK push notification settings for iOS.
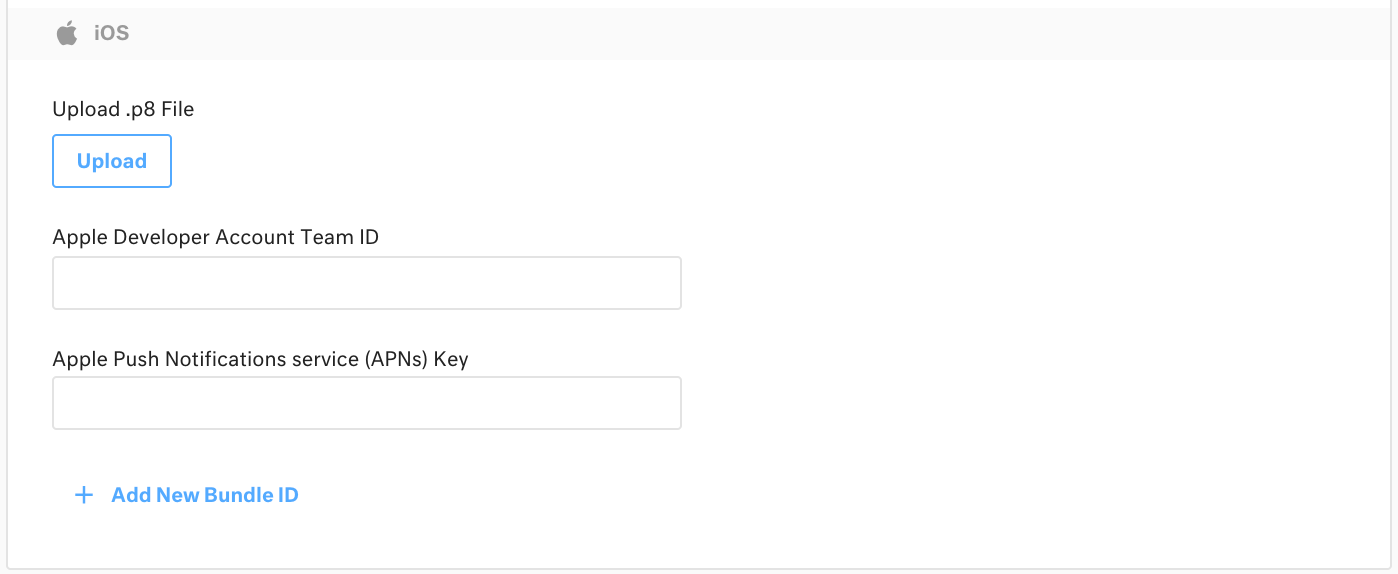
Mobile SDK push notification settings for iOS on the Chat Management: SDK settings page in Kustomer.
Complete the following to generate a keyset to turn on push notifications in Kustomer:
-
Upload a p8 file version of the push key you created earlier in Step 1. Create and download your push key.
-
Add your Apple Developer Account Team ID (available under Membership in the Program Resources navigation in the Apple Developer portal).
-
Add your Apple Push Notifications service (APNs) Key.
-
Add each bundle ID for the apps you want to use with push notifications. Make sure to include bundle IDs for both your Kustomer sandbox and Kustomer production environments.
Select Save Changes to create a keyset for iOS push notifications.
See Push Notifications to learn how to configure push notifications once you turn them on in Kustomer.
Updated almost 2 years ago