Quick start: Chat SDK for iOS
A quick start guide that shows you how to implement and launch the Kustomer Chat SDK in a sample iOS app.
This quick start guide provides step-by-step instructions on how to implement the Kustomer Chat SDK and launch the chat widget for your Kustomer organization in a basic iOS app.
We'll work with a sample app template and the simulator available in Xcode.
Goals
By the end of this tutorial, you'll know how to:
- Create a basic iOS app to run in the simulator
- Add the Kustomer Chat SDK as an app dependency
- Configure the Kustomer Chat SDK
- Launch the Kustomer Chat SDK in a sample iOS app
Prerequisites
Before you get started, make sure you have the following:
- Xcode to create a sample app and run the app in the simulator
- A valid API Key that includes the
org.trackingrole for your Kustomer organization. To learn more, see Requirements. - Admin access to your Kustomer organization
iOS app development experience is helpful but not necessary for completing this tutorial.
Resources for iOS app development
While you'll create a basic iOS app for this tutorial, this quick start guide does not provide in-depth instructions for iOS app development.
For a comprehensive introduction to iOS app development, see Apple’s iOS App Dev Tutorials.
Step 1: Create a new project in Xcode
First, create a new project in Xcode. We'll use a project template to create an iOS app to run in the simulator. The sample app contains a few pre-configured files.
Step 1.1
To create a new project in Xcode, go to File and select New > Project to open the project template screen.
If you're on the Welcome to Xcode screen, select + Create a new Xcode project.
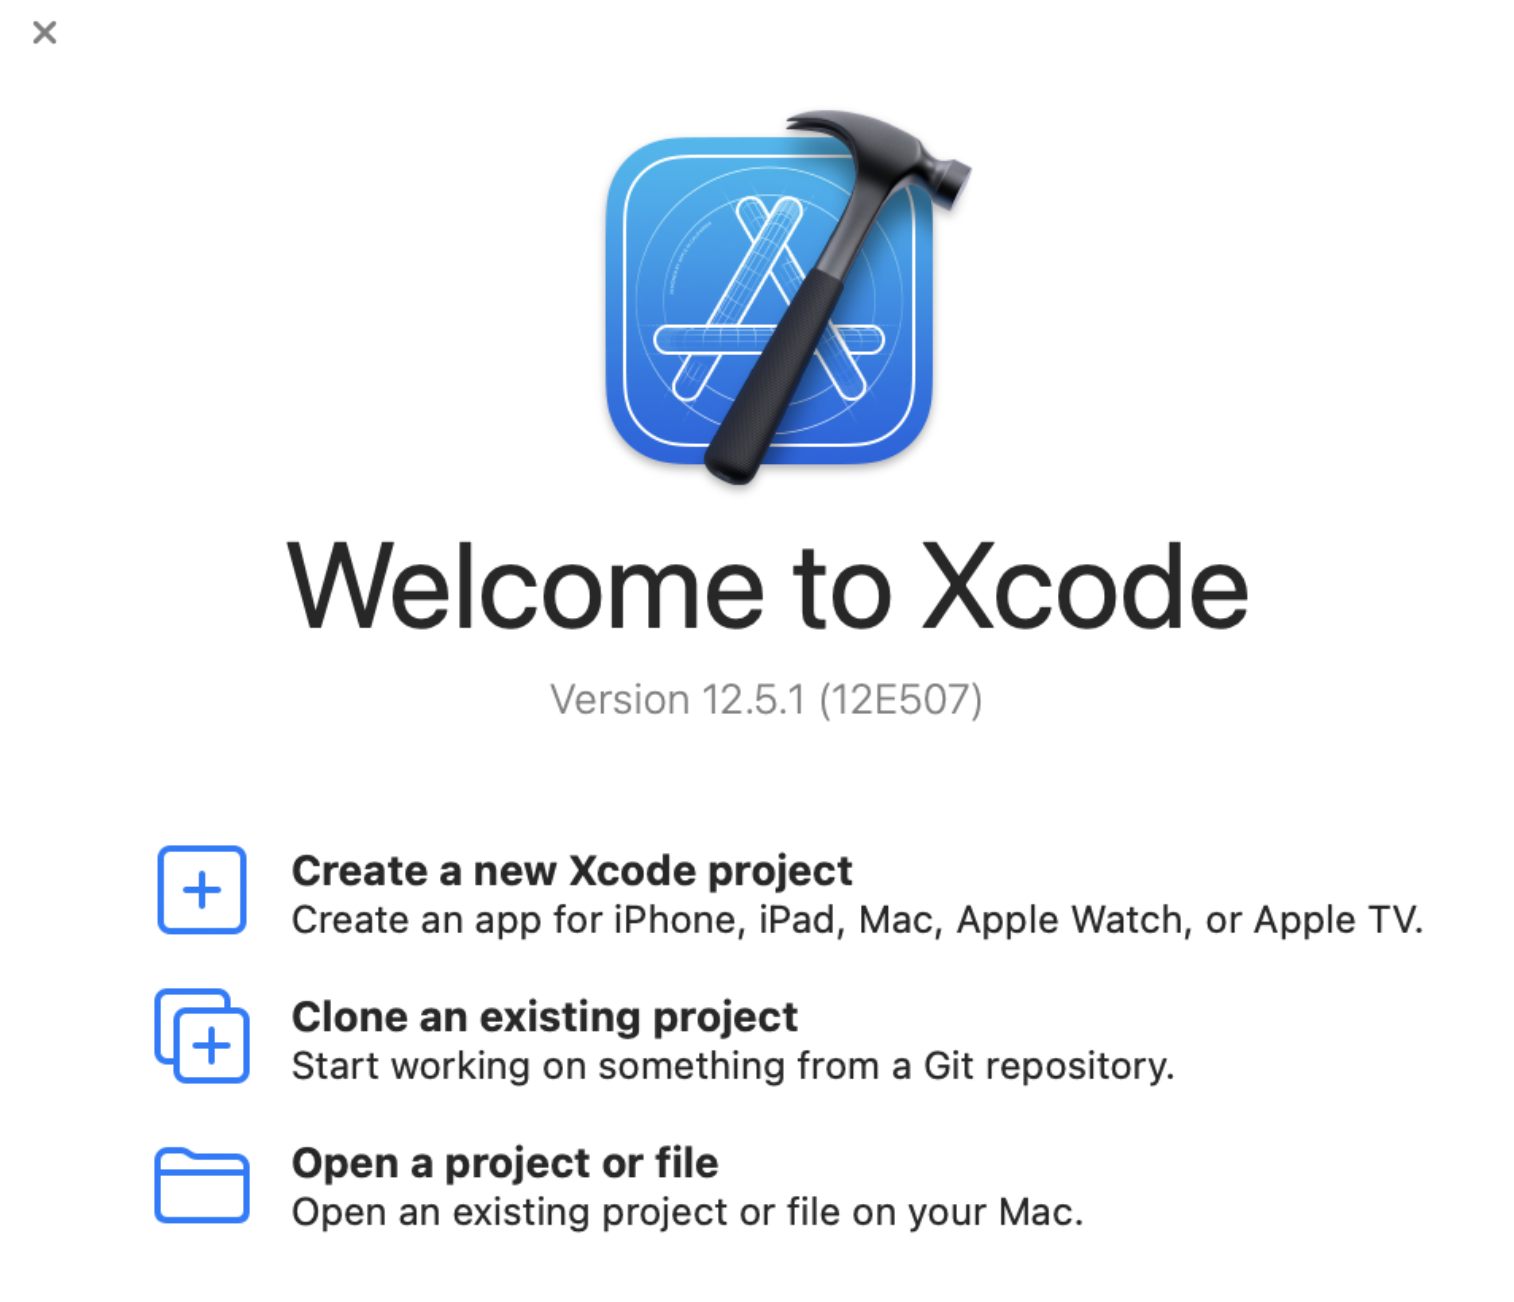
Select + Create new Xcode project.
Step 1.2
On the Choose a template for your new project screen, choose iOS and App and then select Next.
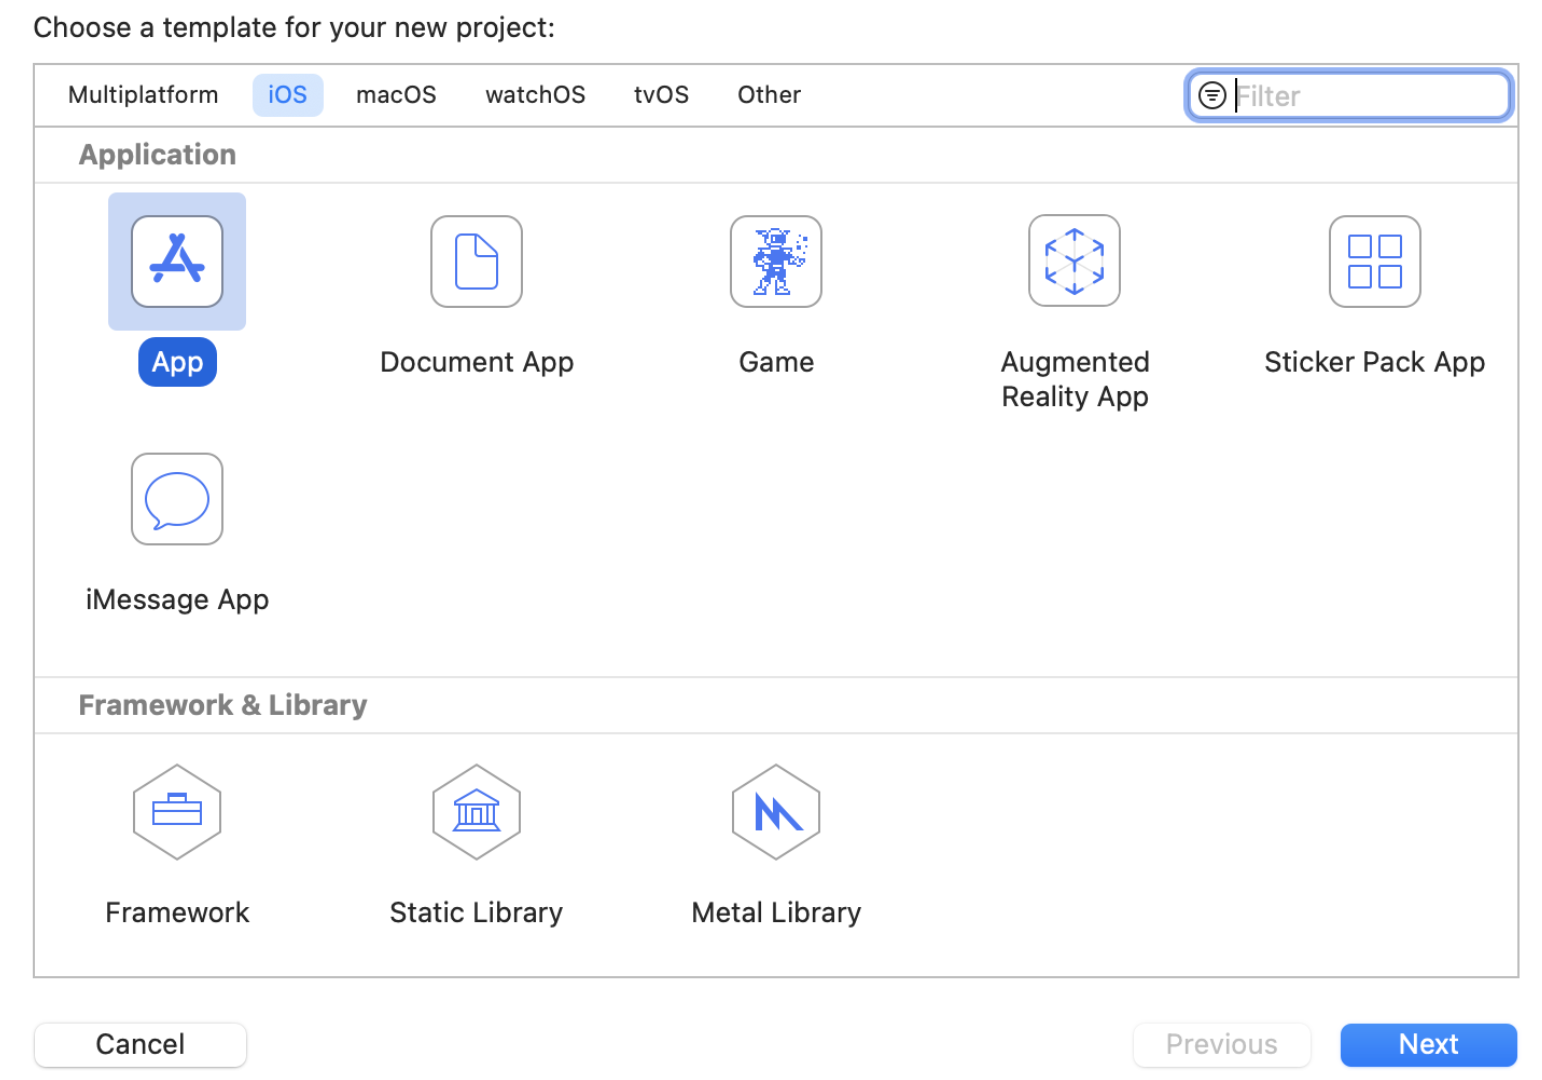
Choose iOS and App from the Application section.
Step 1.3
Next, enter a Product Name and Organization Identifier for your project. For this tutorial, select the Storyboard Interface, UIKit App Delegate Life Cycle, and Swift as the Language.
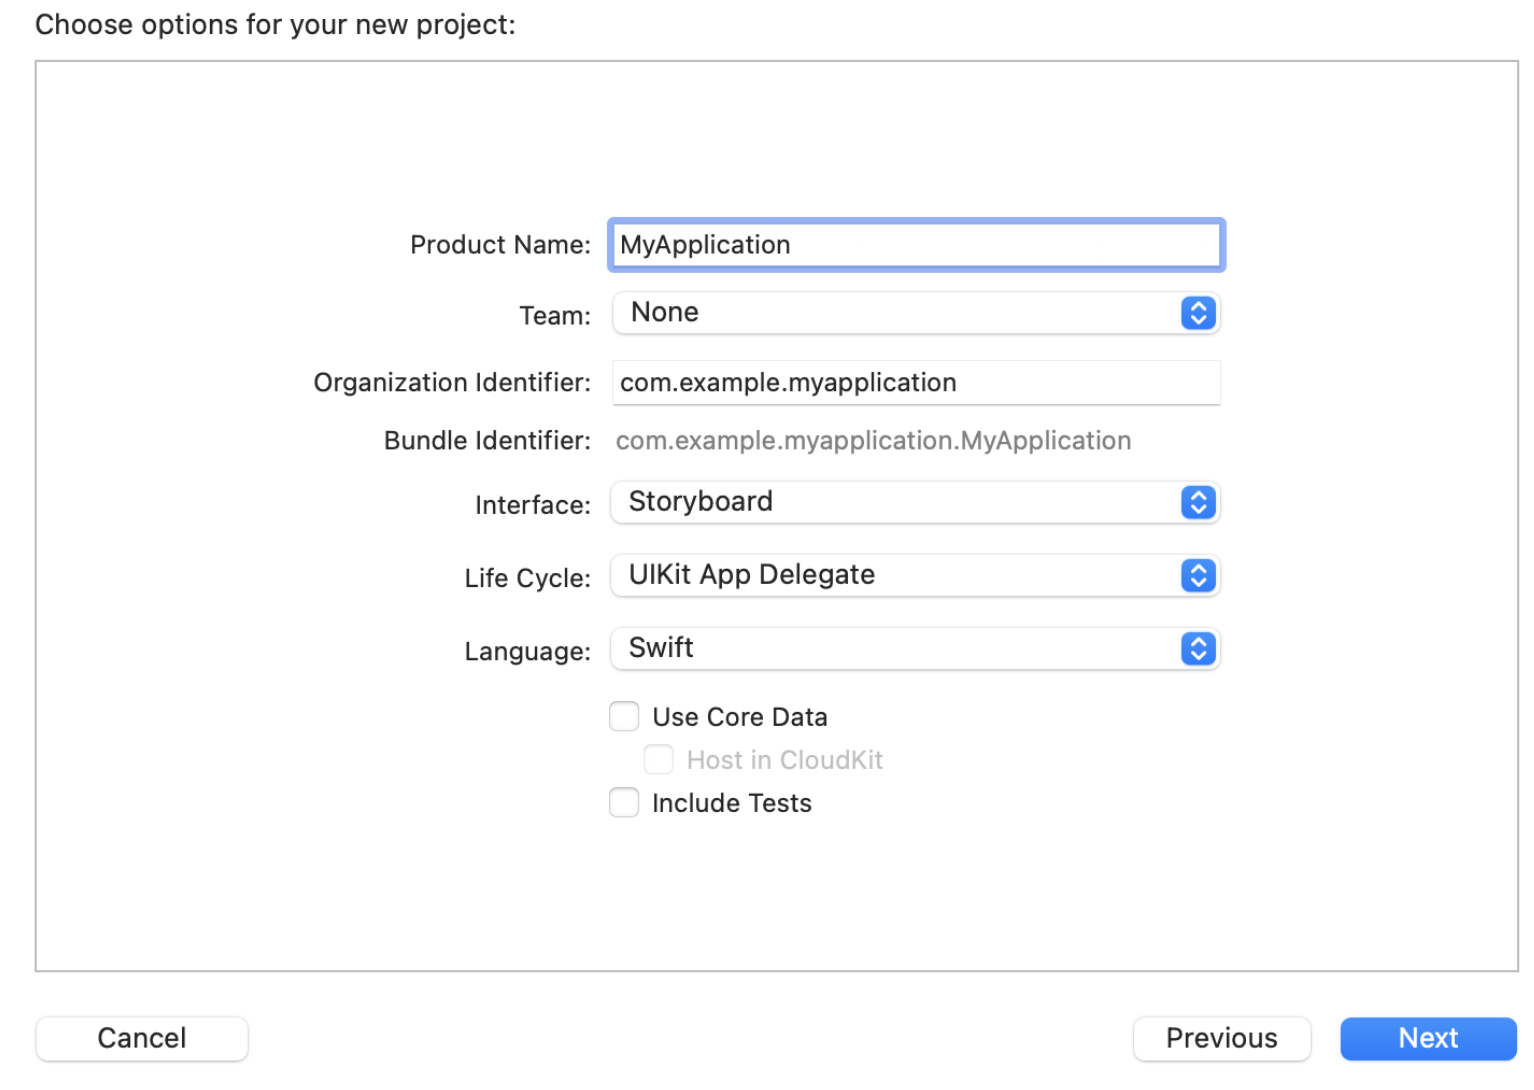
If you prefer, you can use SwiftUI or the Swift UI lifecycle instead. If you choose to use Swift UI lifecycle, you will still need to add an AppDelegate with
application(_:didFinishLaunchingWithOptions:).
Step 1.4
On the next screen, select Create to open your project. Optionally, you may create a git repository.
The General pane of the Project Editor opens. For this tutorial, we recommend leaving the Version set to 1.0.
Confirm that the iOS version in the Deployment Info section is set to a minimum of 11.0. (This value is set higher by default.)
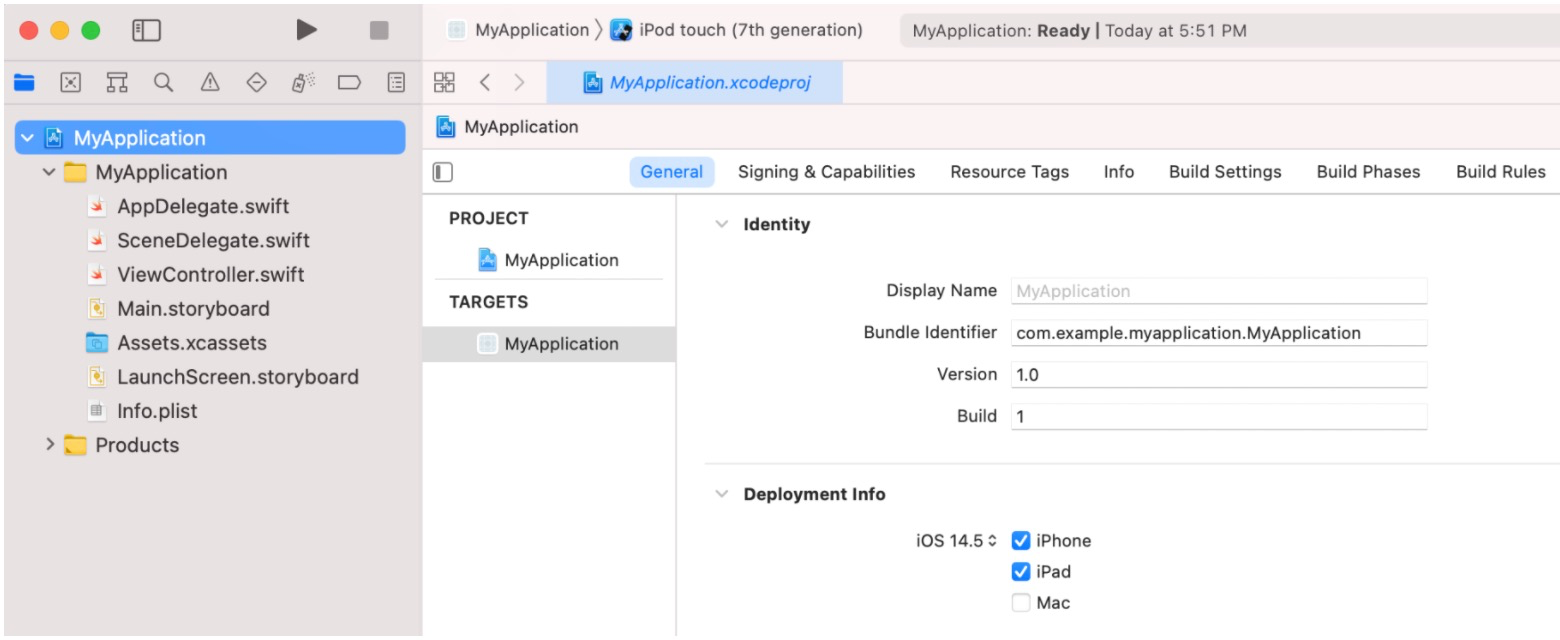
The minimum iOS version is 11.0.
The Kustomer Chat iOS SDK requires at a minimum iOS version 11.0. See Requirements to learn more.
Step 1.5
Select the simulator of your choice and then select Product > Run or click the triangle icon to run the new app on the simulator.

Click the triangle icon to run the new app on the simulator.
When the simulator launches, you will get a blank white screen because nothing has been implemented yet. After you run the sample app in the simulator, continue to Step 2: Add the Kustomer Chat SDK.
Simulator with blank screen
Step 2: Add the Kustomer Chat SDK
Next, we'll add the Kustomer Chat SDK as a Swift package dependency.
Step 2.1
In Xcode, go to File > Swift Packages > Add Package Dependency:
- If running the Kustomer Chat iOS SDK v4.1.1 or higher, enter https://github.com/kustomer/kustomer-ios-spm in the URL field.
- If running an earlier version, enter https://github.com/kustomer/kustomer-ios.
Select Next.
Step 2.2
Next, set the version to span 2.0.0 < 3.0.0. Select Next.
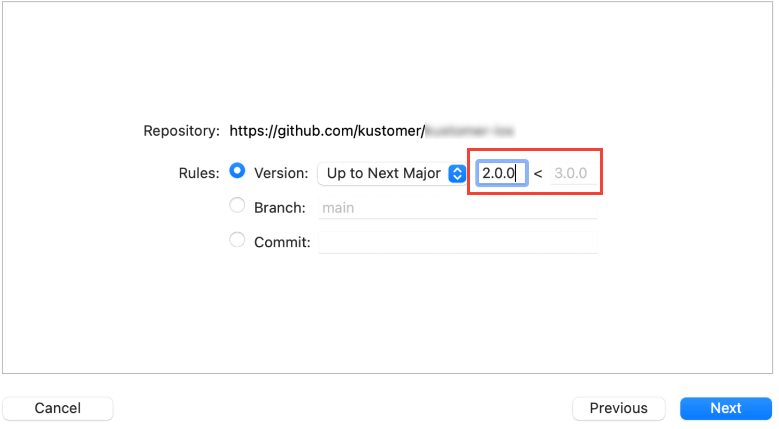
Set the version to span 2.0.0 < 3.0.0
Depending on your internet speed, this step may take a few minutes to complete.
Step 2.3
Once it completes, select Finish. The kustomer-ios package is now listed under Swift Package Dependencies.
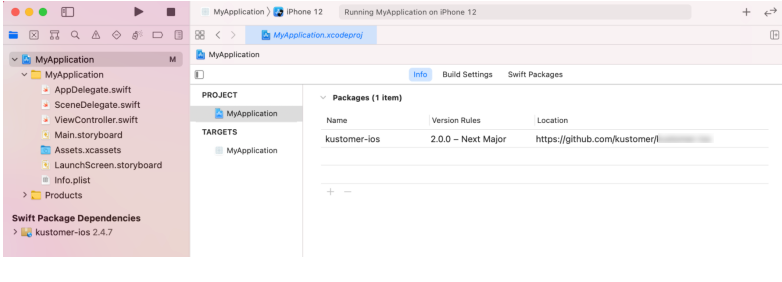
The kustomer-ios package is now listed under Swift Package Dependencies
For instructions on installing with CocoaPods instead of Swift Packages, see CocoaPods Installation.
Step 3: Configure Kustomer in your app delegate
To initialize the Chat iOS SDK, you will need to call Kustomer.configure() in your App Delegate.
Step 3.1
Navigate to AppDelegate.swift and add import KustomerChat to your imports.
Step 3.2
You need to replace the apiKey parameter with a valid API key for your organization that has the org.tracking role. To generate the API key manually:
- In Kustomer, go to Settings in your Kustomer app and select Security > API Keys > Add API Key.
- Enter a descriptive name for your API key. Set Roles to org.tracking and Expires (in days) to No Expiration.
- Select Create to generate a new API Key. You will use this API key in the next step so save it in a secure location
Step 3.3
Finally, call Kustomer.configure()in your AppDelegate application(_:didFinishLaunchingWithOptions:) method and paste the token string into the apiKey parameter.
Kustomer.configure(apiKey: "api key", options: nil, launchOptions: launchOptions)
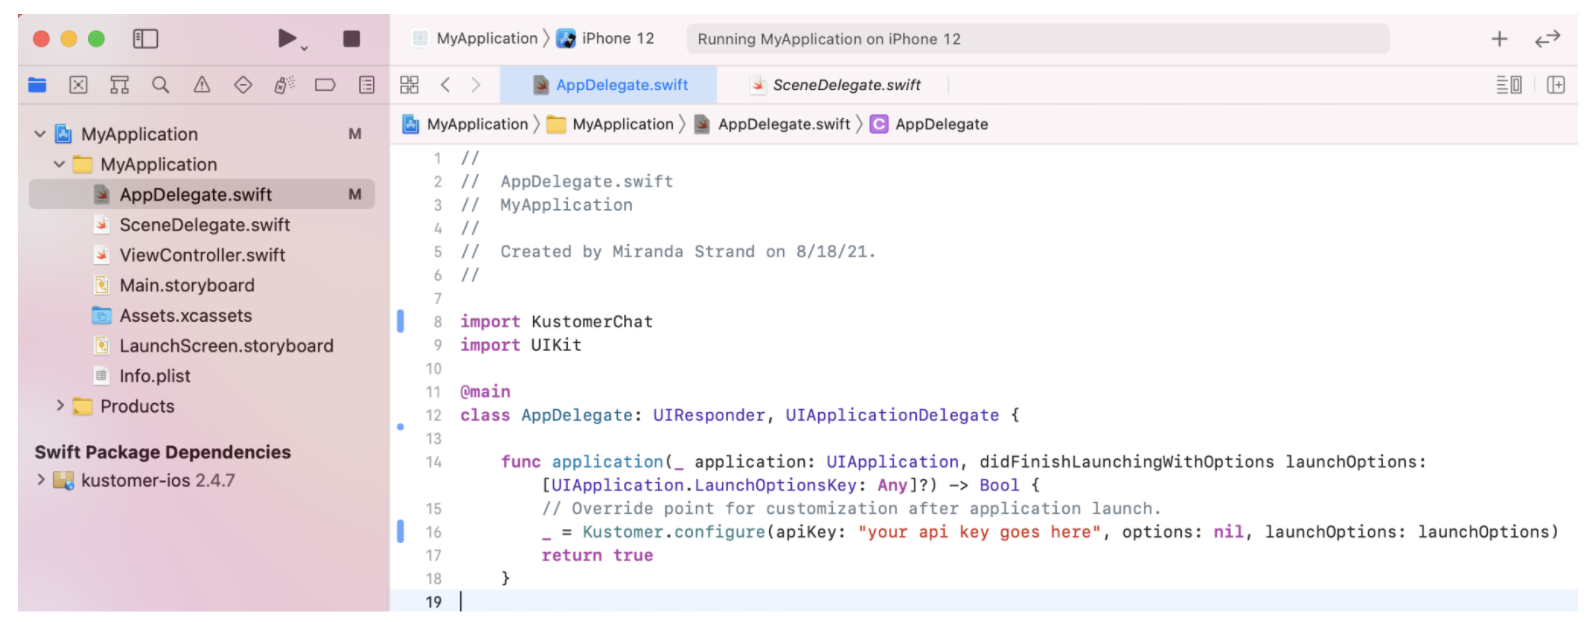
Call Kustomer.configure() and enter your API key in the apiKey parameter.
Step 4: Add a button to launch Kustomer chat
Next, we'll add a button to launch the Kustomer Chat SDK by opening a new conversation.
Step 4.1
Navigate to Main.storyboard. Click the Library icon + in the upper right corner of the window.

Click the Library icon.
Click the Button option and drag the Button onto your view controller.
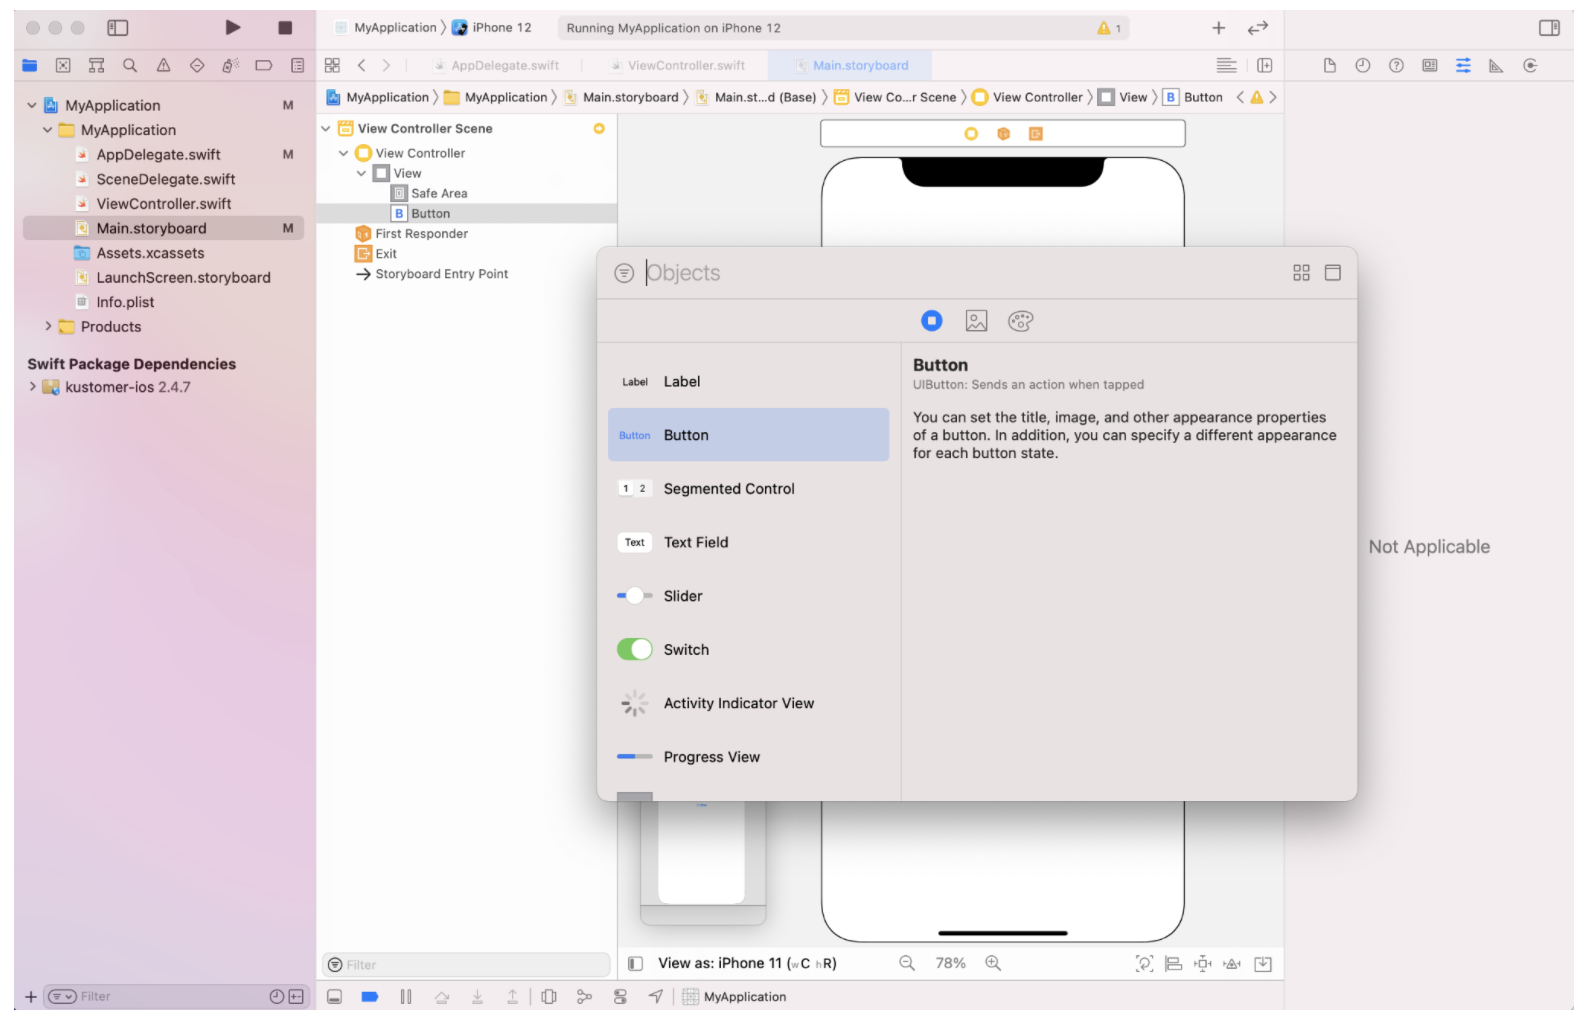
Click Button and drag it to your view controller.
You should now have a button in the middle of the view.
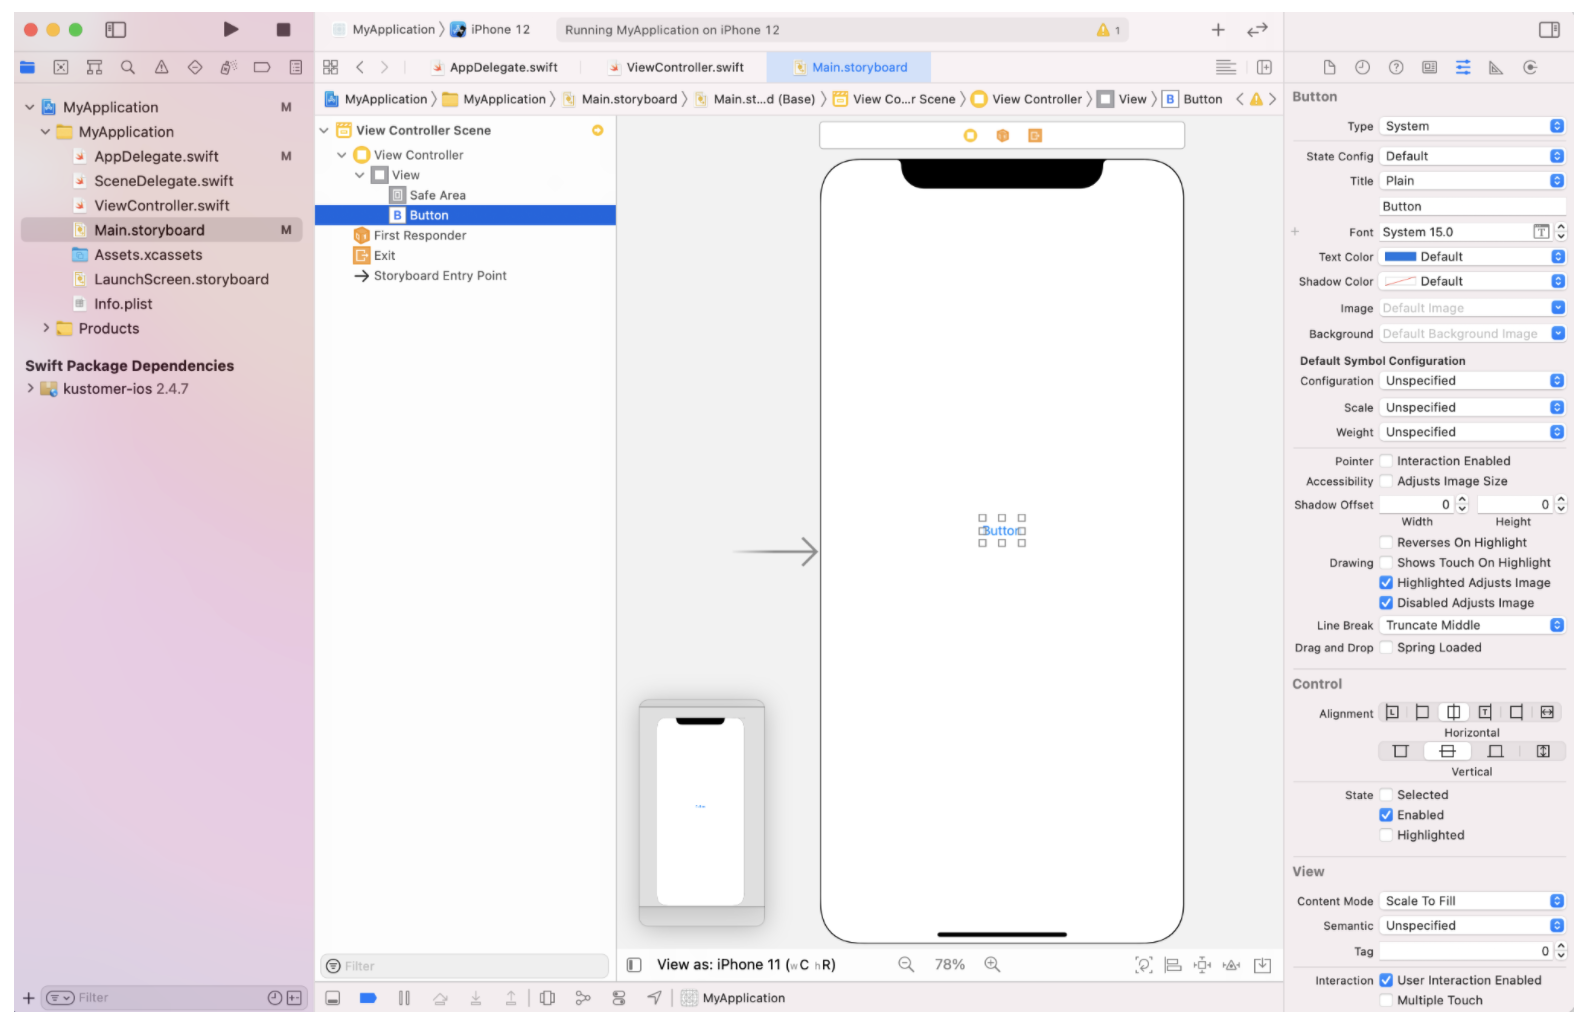
Button in the middle of the view.
Step 4.2
We will now configure this button to look like a chat button.
Drag the button to the bottom right of the iPhone screen. Control-click the button and drag it to the edge of the iPhone screen to open the constraints menu. Select the Trailing Space to Safe Area constraint.
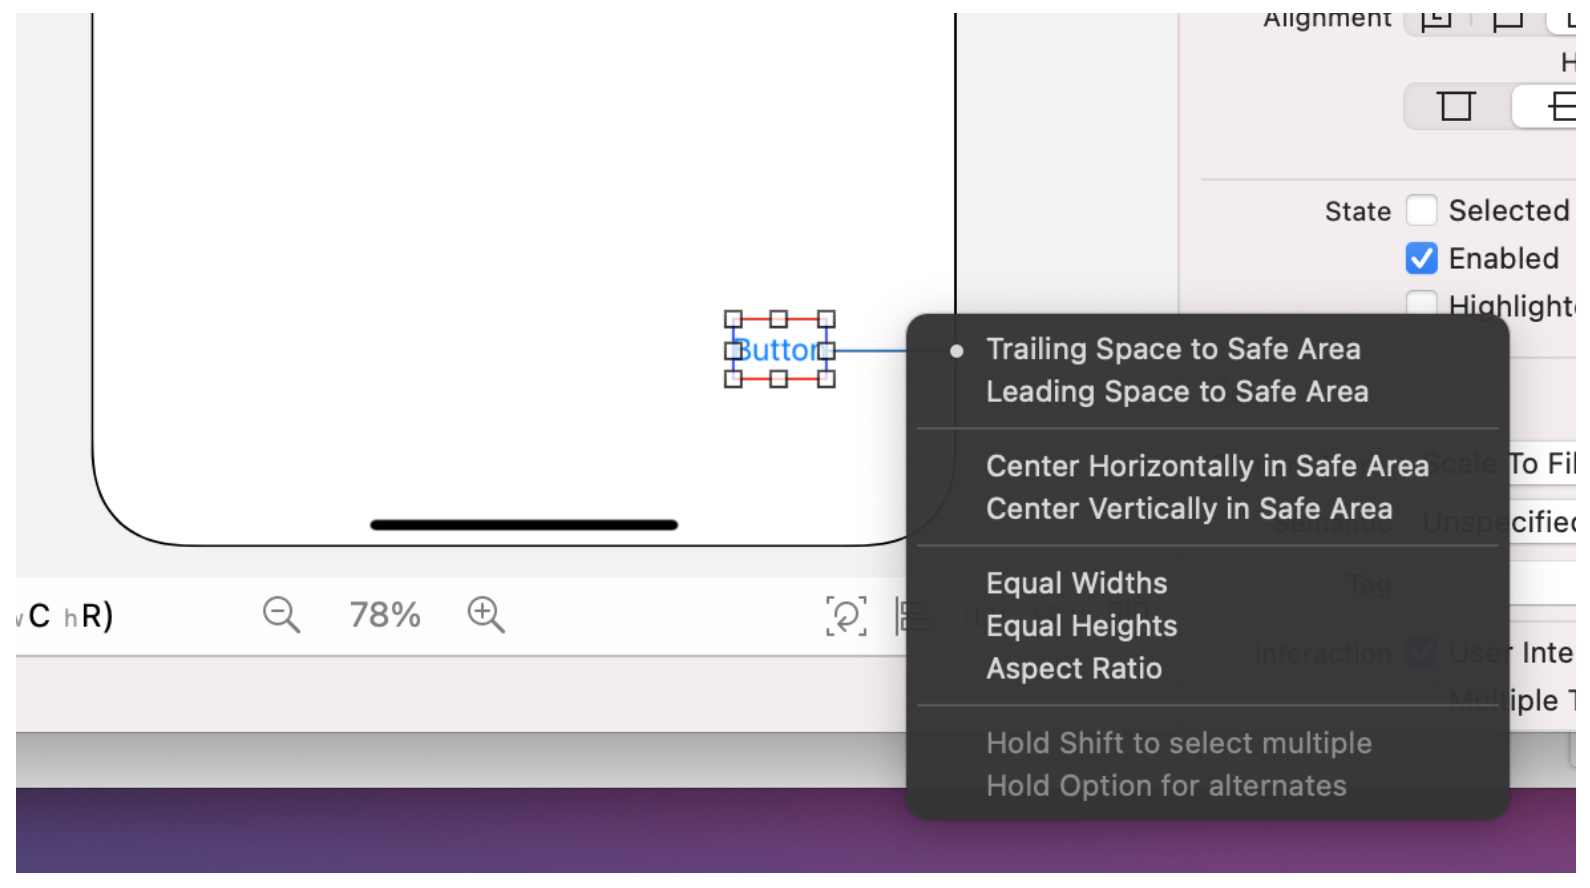
Drag the button to the bottom right of the screen and select Trailing Space to Safe Area from the Constraints menu.
Then, control-click the button again to drag it to the bottom of the iPhone screen and select the Bottom Space to Safe Area constraint.
Now, on the left side panel with the Attributes inspector selected, add an image for the button. In this example, we are using the system image named ellipsis.bubble.
After adding the image, you may also want to drag the side of the button to resize it. You can then set a width constraint by Control-clicking the button, dragging it to the left or right and releasing it within the button, and selecting the Width constraint.
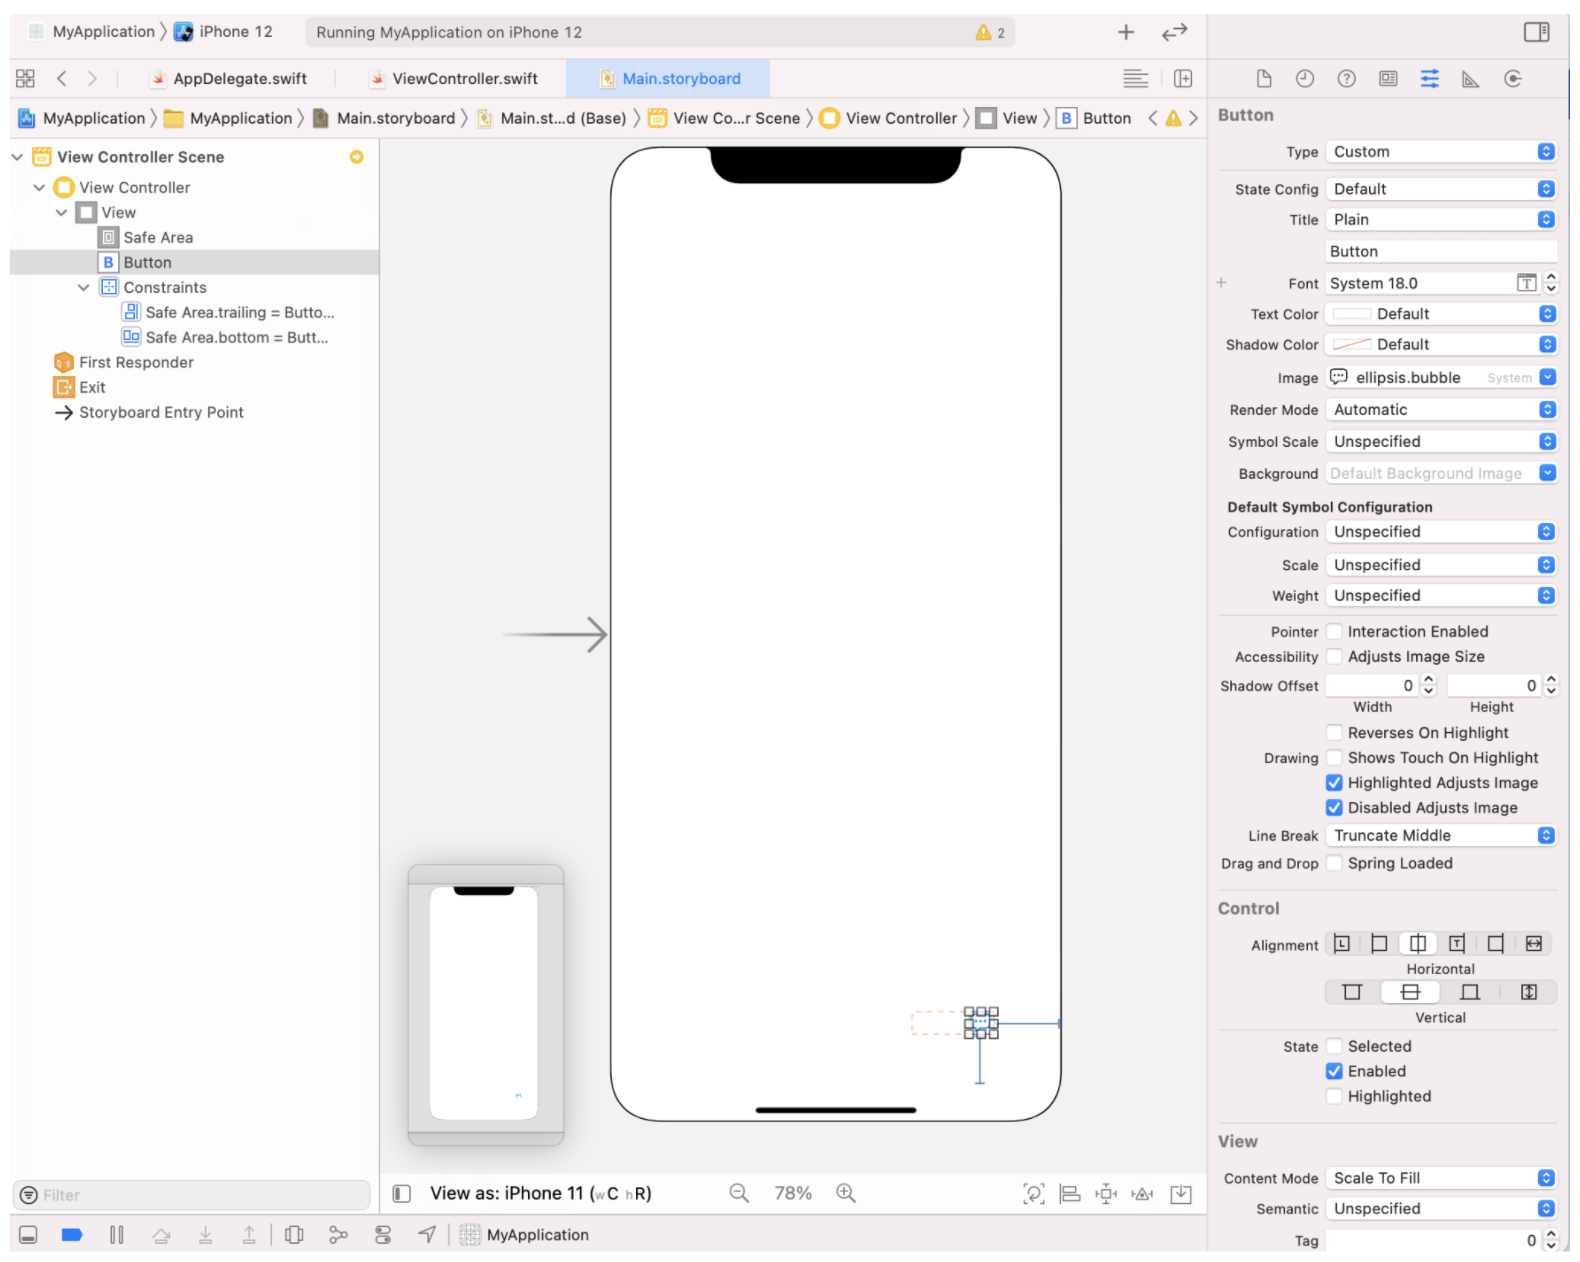
Add an image for the button.
Step 4.3
If you run the app now, you will see a chat button in the bottom right corner that doesn't respond to tapping. The next step is to add an action to the button.
Click the Add Editor icon (shown below) in the upper right corner to open a second file editor.

Add Editor icon located at the upper right corner.
You now see two Main.storyboard editors side by side. Select ViewController.swift on the Navigation panel on the left to open ViewController.swift alongside Main.storyboard instead.
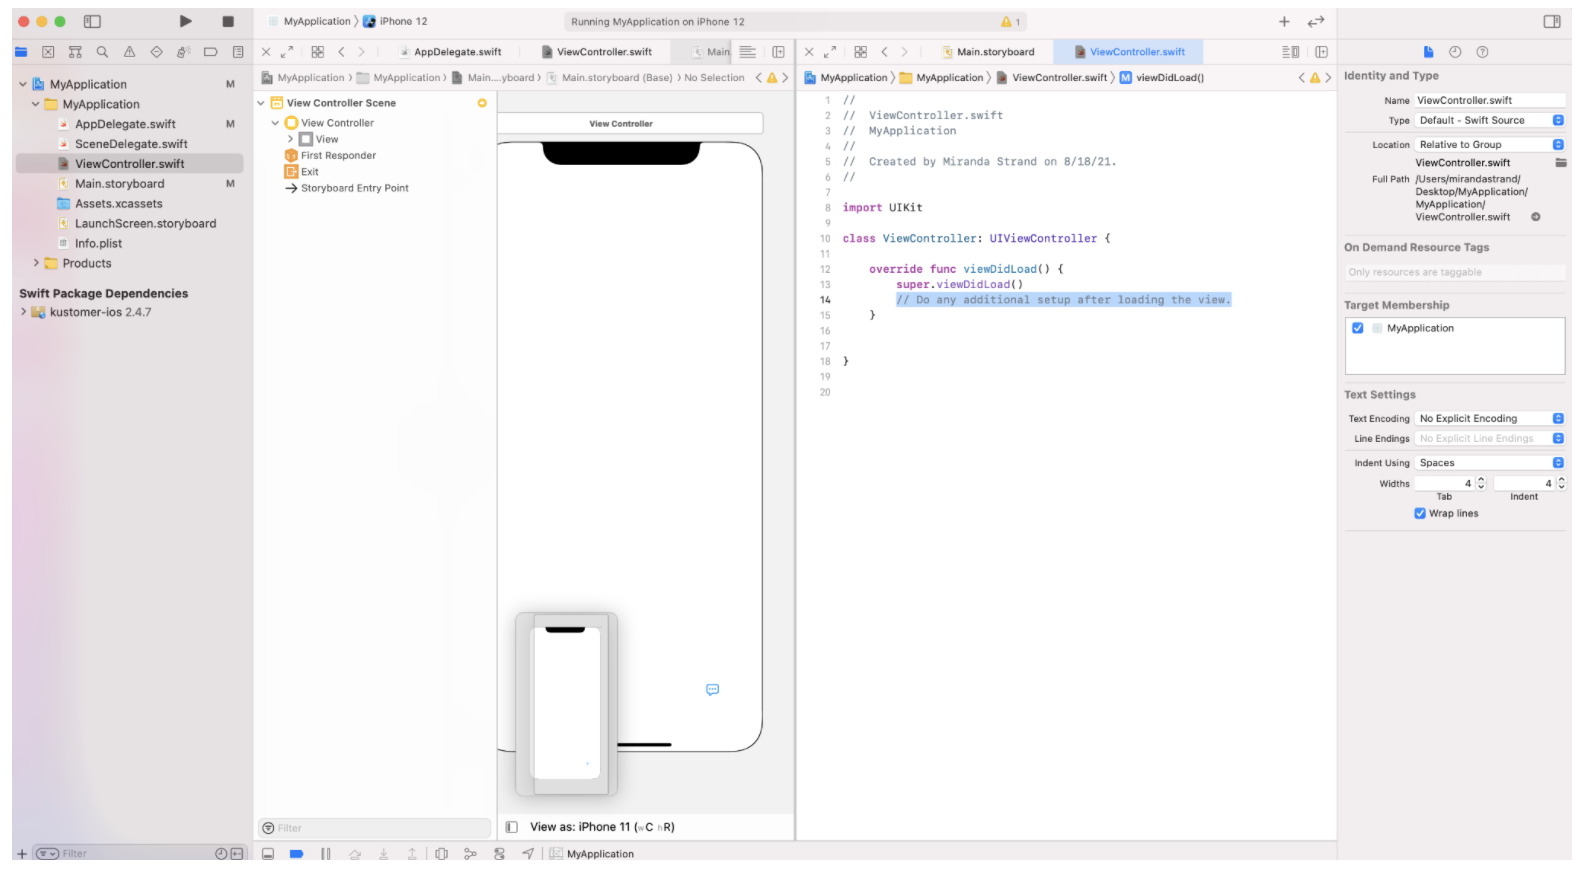
Side-by-side view of ViewController.swift and Main.storyboard.
Now, control-click your button and drag it into ViewController.swift below viewDidLoad() to open a menu to add an Action or Outlet. Select Action in the Connection menu, enter didTapChatButton as the Name, and click Connect.
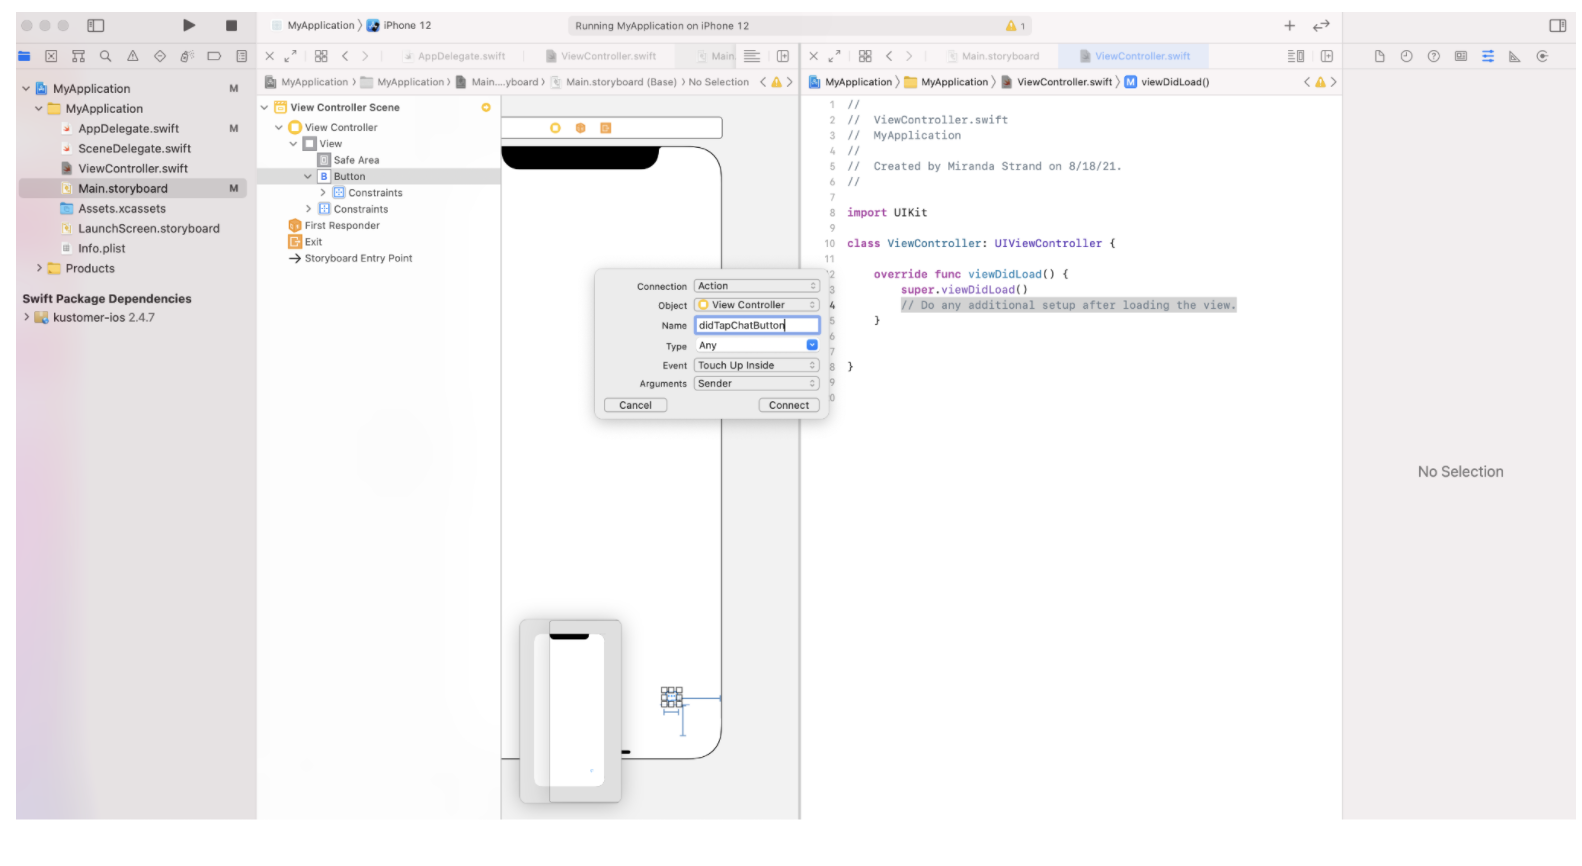
Drag the button to the line underneath the viewDidLoad() method.
Xcode automatically inserts the line of code needed to respond to taps on your button.
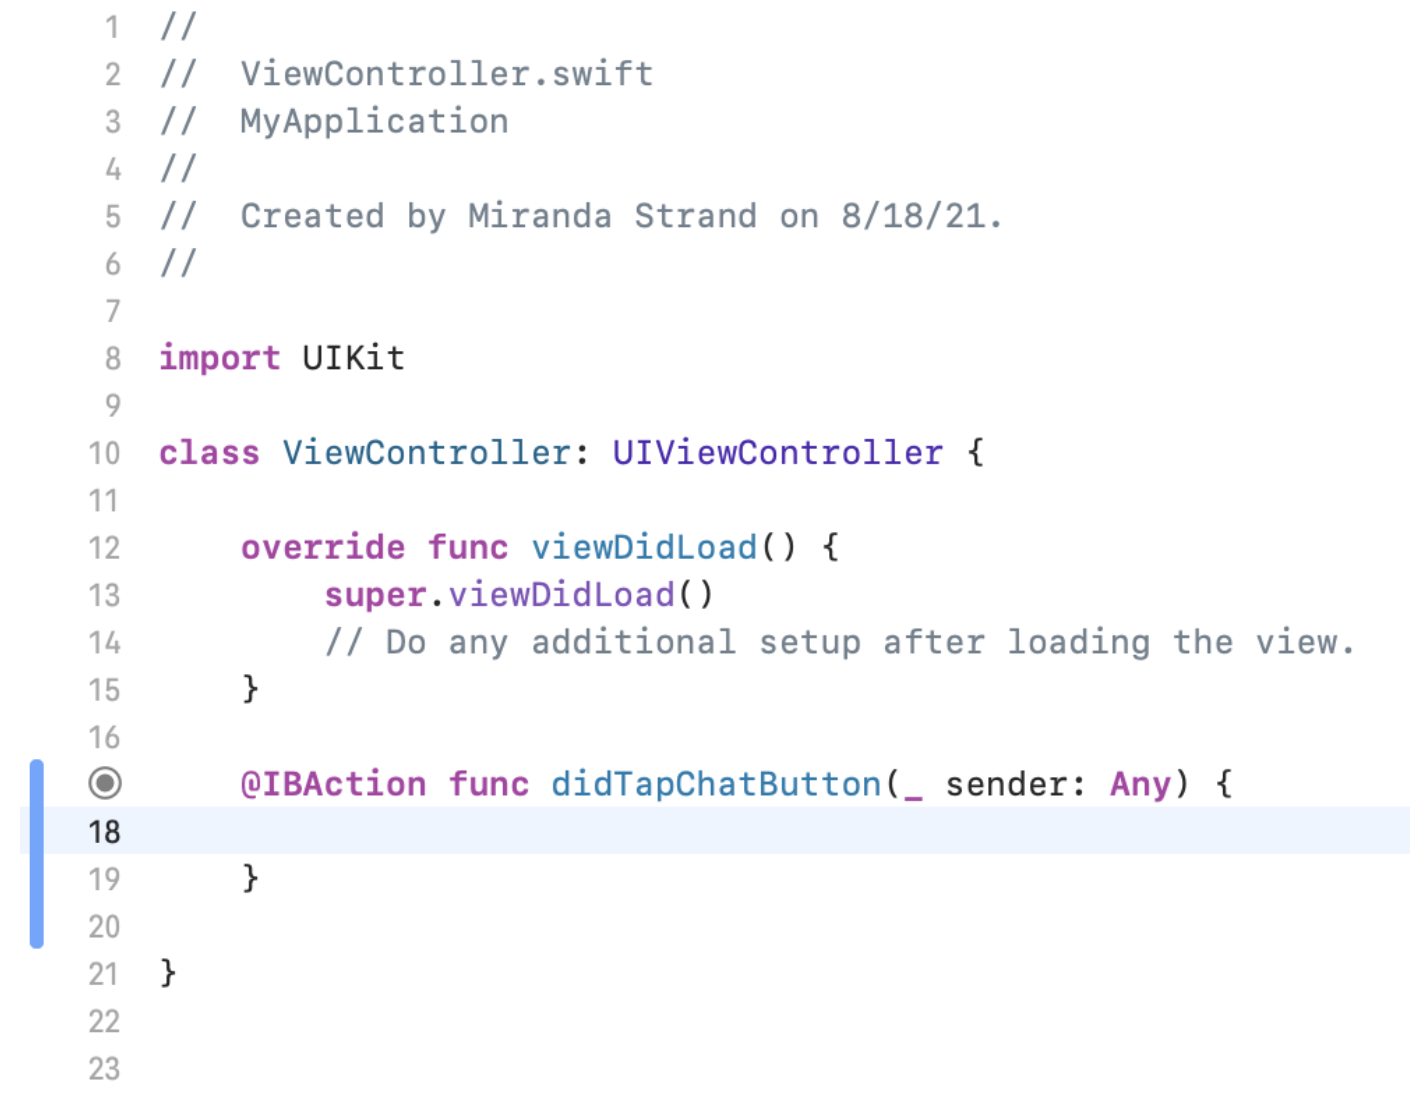
Code inserted by Xcode for button tap response.
Step 4.4
Finally, we want to open a new conversation when tapping the button. As we did with the App Delegate, you will first have to add import KustomerChat to the imports in ViewController.swift.
Then you can add Kustomer.show(preferredView: .newChat) to the body of didTapChatButton().
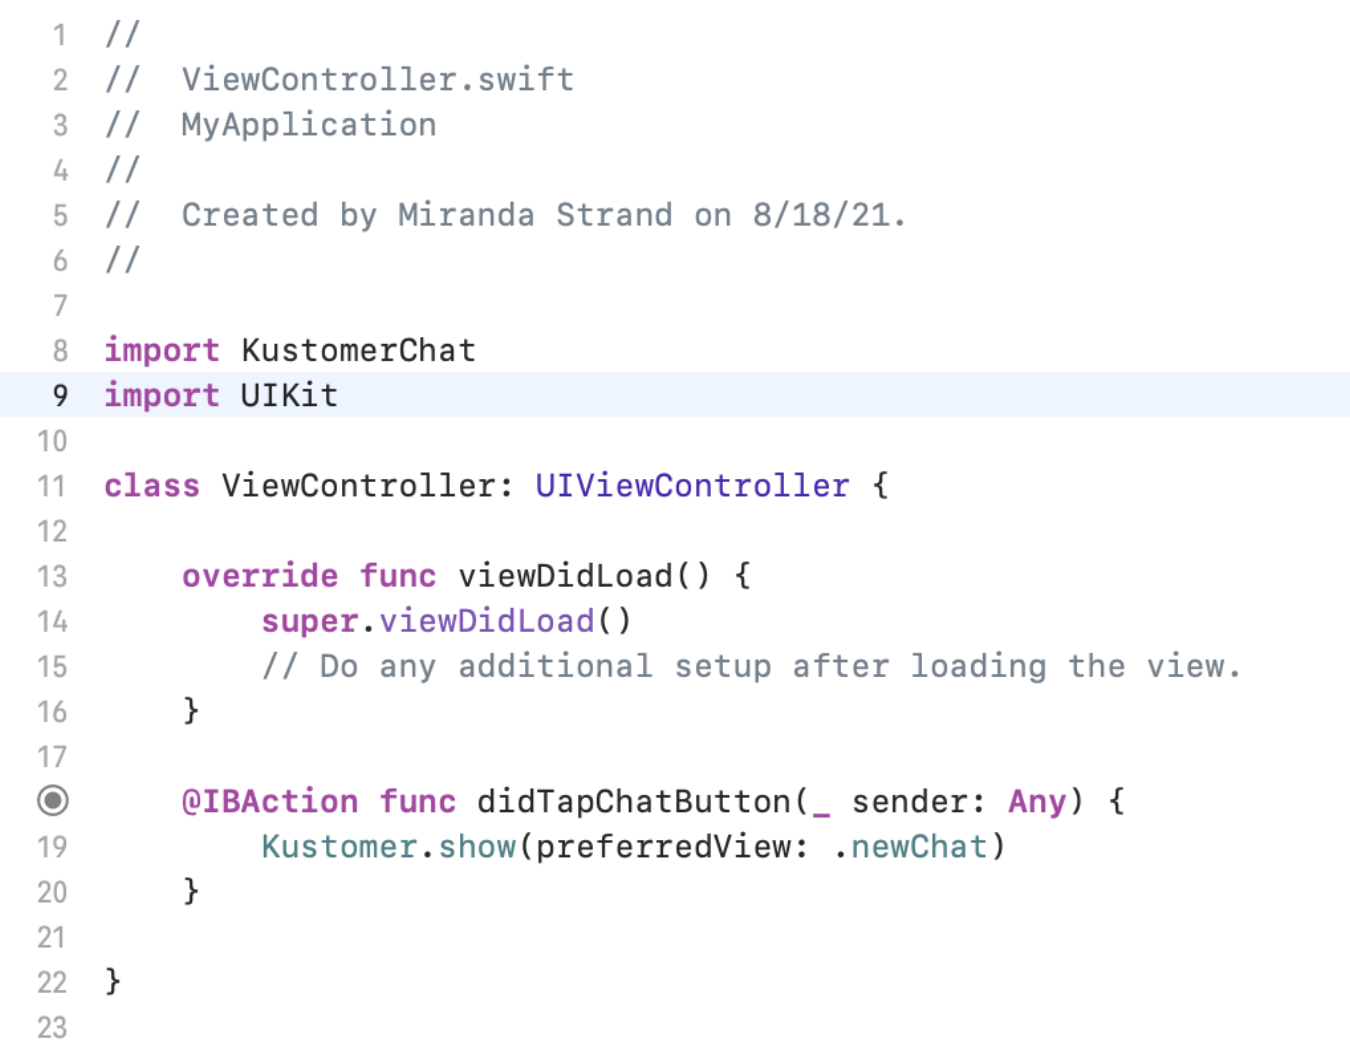
Add import KustomerChat to the imports and then add Kustomer.show(preferredView: .newChat) to the body of didTapChatButton()
Now, when you run the app again, you can tap the chat button to launch the Kustomer Chat SDK and open a new conversation in your app. The Chat SDK will reflect the settings of the default brand for your Kustomer organization.
Alternative to steps 4.1-4.4
If you prefer not to use Storyboards, you can create this same button programmatically by adding the following code to ViewController.swift.
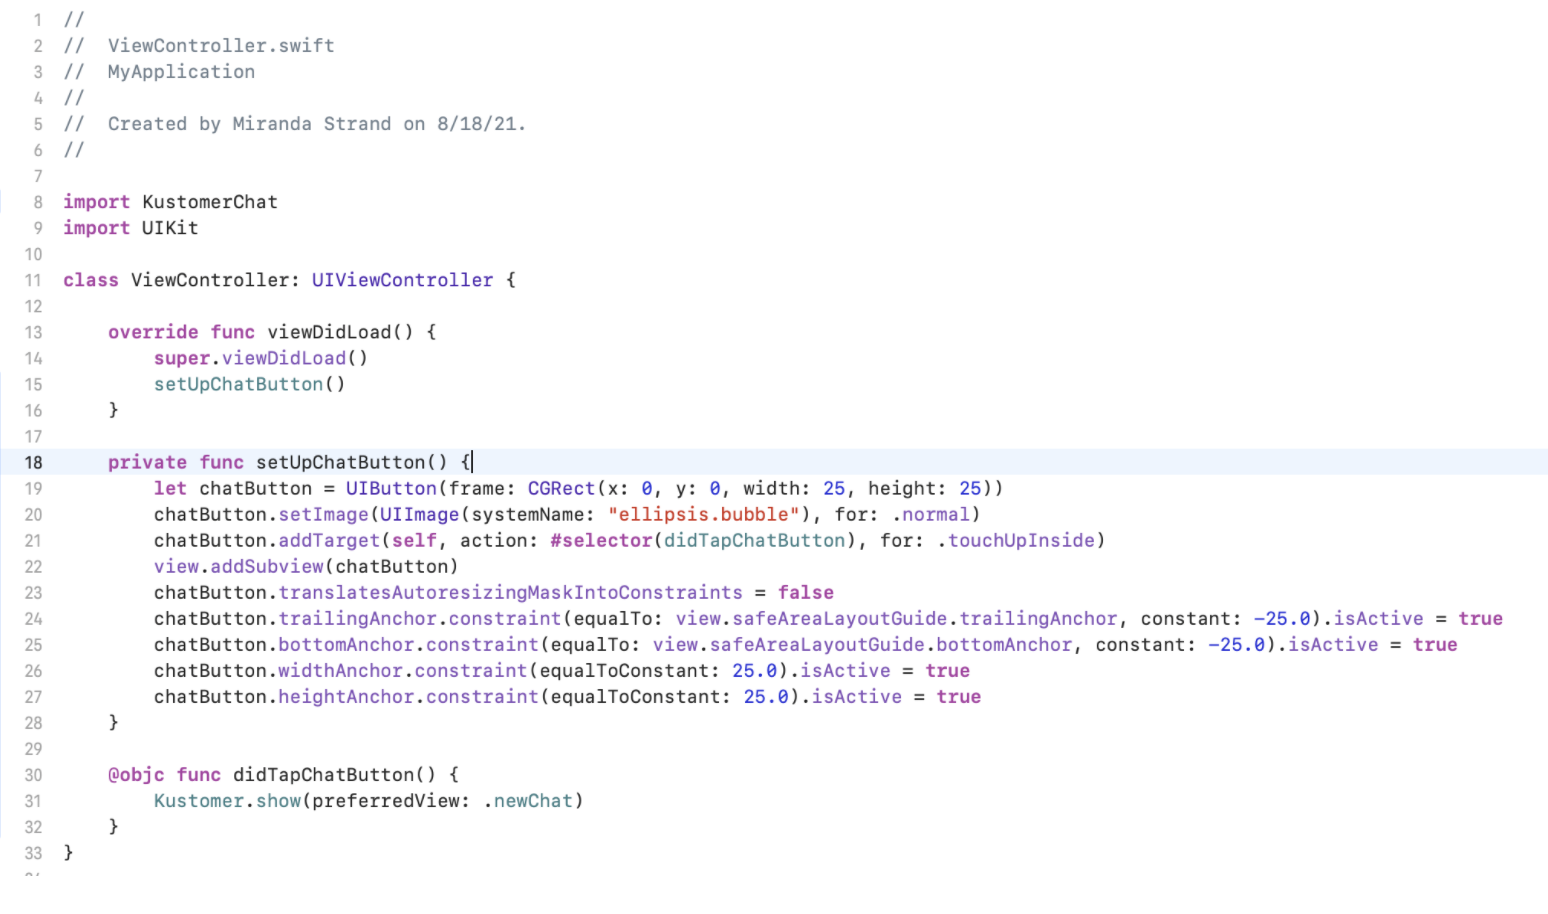
Alternate code to use in ViewController.swift.
Summary
Congratulations on completing the quick start guide!
Here's what we learned how to do in this tutorial:
- How to create and run a sample app in Xcode
- How to add the Kustomer Chat SDK as a Swift Package Dependency
- How to configure the Kustomer Chat SDK in your App delegate
- How to create a new UIButton to launch Kustomer Chat SDK and open the chat widget in your sample app
Updated over 1 year ago